Tag Archives: WebGL

Seven Things for September 23, 2019

Seven things:

Book “WebGL Insights” now free

The book WebGL Insights is now free to download as a PDF. Go get it.

Many of the articles are, of course, WebGL-centric, but some articles in the Rendering Section have general interest, especially for mobile developers. WebGL is “trailing edge,” in that it’s tied to OpenGL ES 2.0, which is what most mobile devices run. So techniques in that section will run in mobile apps in general. WebGL 2 (not covered in this book) is ES 3.0, basically, and current has 22% phone support and 8% tablet support – tablets don’t get refreshed as rapidly as phones.


Debugging WebGL with SpectorJS

by Sebastien Vandenberghe

With the emerging number of experiences built using WebGL, and all the improvements made in the WebVR/AR space, it is critical to have efficient debugging tools. Whether you are just starting out or are already an experienced developer of 3D applications with WebGL, you likely know how tools can be important for productivity. Looking for such tools, you probably came across Patrick Cozzi’s blog post highlighting the most common ones. Unfortunately, many of these tools are no longer compatible with your project, due to missing WebGL2 features or extensions, such as draw buffers, 3D textures, and so on.

As a core contributor to BabylonJS, working at the engine level, on a daily basis I need to see the entire creation of frames, including all the available information from the WebGL state (Depth, Stencil, Blend, etc.) as well as the list of commands along with their arguments. In order to optimize the engine, I also need information and statistics about memory, draw calls, and primitives. These desires were a big motivation for me to develop SpectorJS. And as we love the WebGL community we decided to make it an Open Source Project, compatible with all existing WebGL 3D engines.

At the end of this walkthrough, you will be able to easily capture and inspect any WebGL frames rendered in your favorites applications. If you have any issues, do not hesitate to report them on Github. To stay informed of all the new features, follow us at @SpectorJS.


Table of Contents

Installation

Always looking to save time, the tool is directly available as a browser extension: ChromeFirefox – (more browsers are coming soon)

Embedding the library in your application or side-loading the extension are also possible. More information can be found on Github.

Basic Usage

Once installed, you can now on navigate to any website using WebGL, such as the Babylon JS playground, and you will notice the extension Icon turning red in the toolbar.

This highlights the presence of a canvas with a 3D context in the page or its embedded IFrames. Pressing the toolbar button reloads the page and the icon turns green, as Spector is now ready to capture. During the refresh Spector injects additional debug code that collects state and command information, along with other statistics.

Note: We do not enable it by default, so as to not interfere with any WebGL program unless explicitly requested.

Clicking this green button will display a popup helping you to capture frames.

Following the on-screen instructions and clicking the red circle will trigger a capture. If a canvas is selected, you can also, in this menu, pause or play  the rendered canvas frame by frame. Once the capture has been completed, a result panel will be displayed containing all the information you may need.

The bottom of the menu helps capturing what is happening during the page load on the first canvases present in the document. You can easily choose the number of commands to capture, as well as specify whether or not you would like to capture transient context (context created in the first canvas, even if not part of the DOM).


Note: A few reasons might prevent you capturing the context, the main one being that nothing is rendered if the scene is fully static. If this happens, moving the camera after pressing the capture button should be enough to start the capture.

Note: As collecting the information is pretty expensive, the capture may take a long time and you might have to press wait... a few times when the browser notifies you that the page is unresponsive. Unfortunately, we cannot work around this, as the capture needs to happen synchronously during the execution of your code. Without a synchronous capture, the rest of your code continues to react to external events with potential side effects on the capture.

Capture View

On the left side of the screen are displayed all the different visual state changes happening during the creation of the frame. They are displayed alongside their target frame buffer information. This helps to quickly understand how the frame has been built during troubleshooting sessions. Selecting one of the pictures automatically selects the command associated with it. The visual capture handles all the possible renderable outputs such as cube textures, 3D textures, draw buffers, render target texture, render buffers and so on.

The central panel is the commands panel. It displays the list of commands that were executed on the captured context during the frame. These are displayed chronologically. A color code is used to highlight issues and identify draw calls:

  • Orange Background: The selected command.
  • Blue Background: Draw Calls or Clear commands.
  • Green Command Name: Valid Commands (changing state to a new value).
  • Orange Command Name: Redundant Commands (meaning the value applied is the same as the current one which is useful to optimize a WebGL application)
  • Red Command Name: Deprecated WebGL Commands.

Selecting a command leads to display on the right side all of its detailed information including the command name, arguments, and JavaScript call stack. If a draw call has been selected, the various states involved in this call are all available. This is usually a pretty long list of information, as the captures contains the exhaustive list of states, attachments, programs, shaders, attributes, VAOs, uniforms, UBOs, transform feedbacks, and their attached properties. From this panel, the shader source code is also available from the program information, by following the Click to open link:

This opens a beautified view of the shader code, helping to ensure the defines and the code itself are as expected:

Note: Some information might be empty if there is an issue in the engine. For instance, unbound textures might lead to empty uniform information for the sampler. This is usually an interesting warning and more analytics are in progress to help highlight such use cases better.

A few other views are available for each capture.

Init and End State

Once a capture is open, the top command bar includes links to the initial and final state of the capture. This is useful to see how is the context was before the capture and at the end, to help deal with issues happening between frames, for instance.

Context and Frame Information

Commonly there are issues in WebGL applications related to either the canvas or the context setup. To be sure the current setup is correct, the information panel displays all the queryable information. This also contains statistics about the captured frame such as memory information, number of calls of each command, and drawn primitive information.

Sharing Captures

Since we often collaborate with others on projects or use multiple platforms, it is critical to be able to save and share captures. To do this, you can simply navigate to the Captures link in the menu, where all the captures of the session have been stored. Clicking on the floppy icon (nostalgia FTW) downloads the captured JSON file.

To open and view this file, Drag and Drop it on the Extension popup or the Capture list dedicated area. This feature can save a lot of time troubleshooting customer or cross-platform issues.

How to Compare Captures

As it is needed more often than anybody would like, comparing captures after an engine change is a must-have. A full capture comparison is currently under development, but in the meantime, captures can at least be put in different tabs of the browser, making it easier to check differences.

Checking the box in the popup menu forces the next capture to open in a new tab:

Custom Data

Displaying custom information is a nice trick to quickly identify the relationship between a material and its shader or between a mesh and its buffers. Adding custom data to the capture is achievable by adding a special field named __SPECTOR_Metadata to any WebGLObject. Once the field has been set, any command relying on this object displays the related metadata in the property panel.

javascript var cubeVerticesColorBuffer = gl.createBuffer();
cubeVerticesColorBuffer.__SPECTOR_Metadata = { name: "cubeVerticesColorBuffer" };

This enables the visibility of the custom name “cubeVerticesColorBuffer” in the capture Metadata wherever the buffer is in use.

Extension Control

Another interesting feature is the ability to drive the extension by code. Once the extension is enabled, from your browser’s dev tools, or even your code, you can call the following APIs on “spector.”:

  • captureNextFrame(obj: HTMLCanvasElement | RenderingContext) : Call to begin a capture of the next frame of a specific canvas or context.
  • startCapture(obj: HTMLCanvasElement | RenderingContext, commandCount: number) : Start a capture on a specific canvas or context. The capture will stop once it reaches the number of commands specified as a parameter, or after 10 seconds.
  • stopCapture(): ICapture : Stop the current capture and returns the result in JSON. It displays the result if the UI has been displayed. This returns undefined if the capture has not been completed or did not find any commands.
  • setMarker(marker: string) : Adds a marker that is displayed in the capture, helping you analyze the results.
  • clearMarker() : Clears the current marker from the capture for any subsequent calls.

The “spector” object is available on the window for this purpose.

This can be a tremendous help to capture the creation of your shadow maps, for instance. This can also be used to trigger a capture based on a user interaction or to set markers in your code to better analyse the capture.

The following example could be introduced safely in your code:

if (spector) {
    spector.setMarker("Shadow map creation");
}
[your shadow creation code]
if (spector) {
    spector.clearMarker();
}

Using the Standalone Version

If you prefer to use the library in your own application you can find it available on npm: spectorjs

Going Further

This extension being pretty new and under active development, a few features have been discussed for the next releases:

  • Capture Comparison
  • Image Comparison
  • Remote Debugging
  • Shader Editor
  1. Website
  2. Github
  3. Roadmap
  4. Report Issues
  5. Twitter @SpectorJS

I would like to particularly thank Eric Haines for the time spent to review the article, knowing the challenge it represents considering my English 🙂

WebGL 2 Basics

This guest blog post is by Shuai Shao, a Masters student at UPenn under Patrick Cozzi. After hearing the announcement at SIGGRAPH, I was asking around for someone to write a “basics of WebGL 2” article and Patrick got Shuai involved. If you’re reading this any time after October 2016, see his Github repo for the latest version of this article, with any corrections folded in since then (we encourage you to contribute to it).

WebGL 2 is coming! Google Chrome just announced at SIGGRAPH 2016 that 100% of the WebGL 2 conformance suite is passing (on the first configurations).

If I have an engine that works well in WebGL 1, how do I move to WebGL 2? Things to consider:

  • What has to be changed?
  • What can be done in a better way?
  • What new features and functionalities can I add to my engine?

In this article we are focused on the first question. We discuss the main promoted features, which are supported by extensions in WebGL 1 that are part of the core of WebGL 2 and thus cannot be accessed in the old manner, along with some other compatibility issues.

You can find answers to the other two questions in our next article, which focuses on introducing new features.

In the future you may want some complete working sample code for reference, instead of just code snippets. WebGL 2 Samples pack is a resource you’ll find useful.

That’s enough for an intro. First of all, let’s get WebGL 2 working on your machine.

How do I start using WebGL 2?

Get a WebGL 2 Implementation (Browser)

You may have seen this before, let’s just hit the main points:

Get a WebGL 2 Context

Programmers always try to support as many browsers as possible. So do I. On top the WebGL 1 version of getContext, we will first try to access WebGL 2. If this fails, then drop back to WebGL 1. Here’s an example dervived from the Cesium WebGL engine:

var defaultToWebgl2 = false;

var webgl2Supported = (typeof WebGL2RenderingContext !== 'undefined');
var webgl2 = false;
var gl;

if (defaultToWebgl2 && webgl2Supported) {
    gl = canvas.getContext('webgl2', webglOptions);
    if (gl) {
        webgl2 = true;
    }
}
if (!gl) {
    gl = canvas.getContext('webgl', webglOptions);
}
if (!gl) {
    throw new Error('The browser supports WebGL, but initialization failed.');
}

Promoted Features

Some of the new WebGL 2 features are already available in WebGL 1 as extensions. However, these features will be part of the core spec in WebGL 2, which means support is guaranteed. In this first blog entry we are going to focus on these promoted features, together with potential compatibility issues they may cause.

First let’s find if there’s a way to change fewest existing WebGL 1 code using the extension to make it work correctly with a WebGL 2 context.

We may find that in some cases (instancing and VAO), it’s only the function we are calling that changes from the extension version to core version, while the parameters and pipeline don’t change. We used to call fooEXT, now we simply switch to foo.

Thanks to Javascript’s neat support of function objects, one solution is that we can create a function handler at startup, assigned with either the extension version from WebGL 1 or the core version from WebGL 2. Within the rest of the code we call this function handler.

if (!webgl2) {
    vaoExt = gl.getExtension("OES_vertex_array_object");
    //...
    gl.createVertexArray = vaoExt.createVertexArrayOES;
    //...
}

Yet this method can fail when changes are made in the shader (e.g., MRT). We still need to take a close look at each of these promoted features. So now let’s take a look at how the code changes for each of them.

Multiple Render Targets

MRT is a commonly used extension for deferred rendering, OIT, single-pass picking, etc.

WebGL 1

For MRT we used the WEBGL_draw_buffers extension as a work-around to write g-buffers in a single pass. Though it is widely supported (currently 57%+ browsers, according to WebGL stats), the extension-style code isn’t as clean as WebGL 2:

var ext = gl.getExtension('WEBGL_draw_buffers');
if (!ext) {
  // ...
}

We then bind multiple textures, tx[] in the example below, to different framebuffer color attachments.

var fb = gl.createFramebuffer();
gl.bindFramebuffer(gl.FRAMEBUFFER, fb);
gl.framebufferTexture2D(gl.FRAMEBUFFER, ext.COLOR_ATTACHMENT0_WEBGL, gl.TEXTURE_2D, tx[0], 0);
gl.framebufferTexture2D(gl.FRAMEBUFFER, ext.COLOR_ATTACHMENT1_WEBGL, gl.TEXTURE_2D, tx[1], 0);
gl.framebufferTexture2D(gl.FRAMEBUFFER, ext.COLOR_ATTACHMENT2_WEBGL, gl.TEXTURE_2D, tx[2], 0);
gl.framebufferTexture2D(gl.FRAMEBUFFER, ext.COLOR_ATTACHMENT3_WEBGL, gl.TEXTURE_2D, tx[3], 0);

Next we map the color attachments to draw buffer slots that the fragment shader will write to using gl_FragData.

ext.drawBuffersWEBGL([
  ext.COLOR_ATTACHMENT0_WEBGL, // gl_FragData[0]
  ext.COLOR_ATTACHMENT1_WEBGL, // gl_FragData[1]
  ext.COLOR_ATTACHMENT2_WEBGL, // gl_FragData[2]
  ext.COLOR_ATTACHMENT3_WEBGL  // gl_FragData[3]
]);

Also, an extra flag is needed in the shader:

#extension GL_EXT_draw_buffers : require
precision highp float;
// ...
void main() {
    gl_FragData[0] = vec4( v_position.xyz, 1.0 );
    gl_FragData[1] = vec4( v_normal.xyz, 1.0 );
    gl_FragData[2] = texture2D( u_colmap, v_uv );
    gl_FragData[3] = texture2D( u_normap, v_uv );
}

WebGL 2

For MRT our code becomes neat and clean in WebGL 2.

gl.framebufferTexture2D(gl.DRAW_FRAMEBUFFER, gl.COLOR_ATTACHMENT0, gl.TEXTURE_2D, tex[0], 0);
gl.framebufferTexture2D(gl.DRAW_FRAMEBUFFER, gl.COLOR_ATTACHMENT1, gl.TEXTURE_2D, tex[1], 0);
gl.framebufferTexture2D(gl.DRAW_FRAMEBUFFER, gl.COLOR_ATTACHMENT2, gl.TEXTURE_2D, tex[2], 0);

defines an array of buffers into which outputs will be written. Draw by:

gl.drawBuffers( [gl.COLOR_ATTACHMENT0, gl.COLOR_ATTACHMENT1, gl.COLOR_ATTACHMENT2] );

Instead of mapping color attachments to the draw buffer, we directly use multiple out variables in the fragment shader. This code actually benefits from the new GLSL 3.0 ES, which we will discuss later in another blog post. However, using out itself is straightforward.

#version 300 es
precision highp float;
layout(location = 0) out vec4 gbuf_position;
layout(location = 1) out vec4 gbuf_normal;
layout(location = 2) out vec4 gbuf_colmap;
layout(location = 3) out vec4 gbuf_normap;
//...
void main()
{
    gbuf_position = vec4( v_position.xyz, 1.0 );
    gbuf_normal = vec4( v_normal.xyz, 1.0 );
    gbuf_colmap = texture2D( u_colmap, v_uv );
    gbuf_normap = texture2D( u_normap, v_uv );
}

Additionally, since Texture 2D Array is now available, we can choose to render to different layers of an array of texture 2d’s instead of separate 2d textures.

gl.framebufferTextureLayer(gl.DRAW_FRAMEBUFFER, gl.COLOR_ATTACHMENT0, texture, 0, 0);
gl.framebufferTextureLayer(gl.DRAW_FRAMEBUFFER, gl.COLOR_ATTACHMENT1, texture, 0, 1);
gl.framebufferTextureLayer(gl.DRAW_FRAMEBUFFER, gl.COLOR_ATTACHMENT2, texture, 0, 2);

Instancing

Instancing is a great performance booster for certain types of geometry, especially objects with many instances but without many vertices. Good examples are grass and fur. Instancing avoids the overhead of an individual API call per object, while minimizing memory costs by avoiding storing geometric data for each separate instance.

Instancing is exposed through the ANGLE_instanced_arrays extension in WebGL 1 (92%+ support). Now with WebGL 2 we can simply use drawArraysInstanced or drawArraysInstanced for the draw calls.

gl.drawArraysInstanced(gl.TRIANGLES, 0, 3, 2);

There is a new built-in variable (GLSL 3.0 ES) in the vertex shader called gl_InstanceID that can help with the draw instance call. For example, we can use this to assign each instance with a separate color.

// Vertex Shader
flat out int in instance
// ...
void main() {
    instance = gl_InstanceID;
}
// Fragment Shader
uniform Material {
    vec4 diffuse[NUM_MATERIALS];
} material;
flat in int instance;   // `flat` is a must for a int varying, plus we don't want the instance id to be interpolated
// ...
void main() {
    color = material.diffuse[instance % NUM_MATERIALS];
}

Vertex Array Object

VAO is very useful in terms of engine design. It allows us to store vertex array states for a set of buffers in a single, easy to manage object. It is exposed through the OES_vertex_array_object extension in WebGL 1 (89%+).

WebGL 1 with extension WebGL 2
createVertexArrayOES createVertexArray
deleteVertexArrayOES deleteVertexArray
isVertexArrayOES isVertexArray
bindVertexArrayOES bindVertexArray

An example:

var vertexArray = gl.createVertexArray();
gl.bindVertexArray(vertexArray);

// set vertex array states
var vertexPosLocation = 0; // set with GLSL layout qualifier
gl.enableVertexAttribArray(vertexPosLocation);
gl.bindBuffer(gl.ARRAY_BUFFER, vertexPosBuffer);
gl.vertexAttribPointer(vertexPosLocation, 2, gl.FLOAT, false, 0, 0);
gl.bindBuffer(gl.ARRAY_BUFFER, null);
// ...

gl.bindVertexArray(null);

// ...

// render
gl.bindVertexArray(vertexArray);
gl.drawArrays(gl.TRIANGLES, 0, 6);

Shader Texture LOD

The Shader Texture LOD Bias control makes mipmap level control simpler for glossy environment effects in physically based rendering. This functionality is exposed through the EXT_shader_texture_lod extension in WebGL 1 (71%+).

vec4 texture2DLodEXT(sampler2D sampler, vec2 coord, float lod)

Now as part of core, the lodBias can be passed as an optional parameter to texture

gvec4 texture (gsampler2D sampler, vec2 P [, float bias] )

Fragment Depth

The fragment shader can explicitly set the depth value for the current fragment. This operation can be expensive because it can cause the early-z optimization to be disabled. However, it is needed in cases where the z-depth is modified on the fly.

This functionality is exposed through the EXT_frag_depth extension in WebGL 1 (66%+).

out float gl_FragDepth;

More details can be found in the GLSL 3.0 ES Spec.

Other compatibility issues

Look here for more information: WebGL 2 Spec Ch4.1

Credits

WebGL Links Page

I got tired of re-finding various useful WebGL and three.js links, so I made a page:

http://www.realtimerendering.com/webgl.html

What cool things am I missing?

I’ve made it a page of links I am likely to want to check out in the future. It’s a bit hard to draw the line. For example, I didn’t bother adding fun demos such as this and this, but I did add the page where I browse new demos. I don’t list development systems such as Goo Create for non-programmers, which is built on this open-source WebGL engine and has some interesting features. Nice things all, but I personally am unlikely to come back to them (or if I do, they’re now in this blog post).

Reflections on a WebGL MOOC

Ed Angel
Professor Emeritus of Computer Science
University of New Mexico
http://www.cs.unm.edu/~angel
angel@cs.unm.edu

[This is a guest post from Ed on a subject near and dear to my heart, online learning. – Eric]

Recently I finished teaching a Coursera MOOC entitled Interactive Computer Graphics with WebGL. Having taken Eric’s excellent three.js course with Udacity, I was interested in doing a very different course. The experience was interesting, at times exasperating, ultimately rewarding and a lot of work. Here are some of my observations, many of which echo some of Eric’s on previous blog posts, and many that relate to the present state of MOOCs.

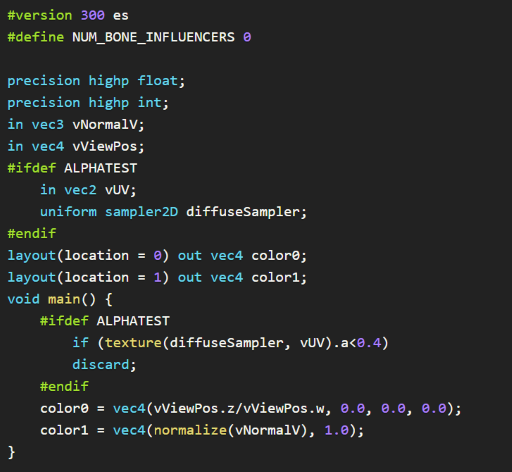
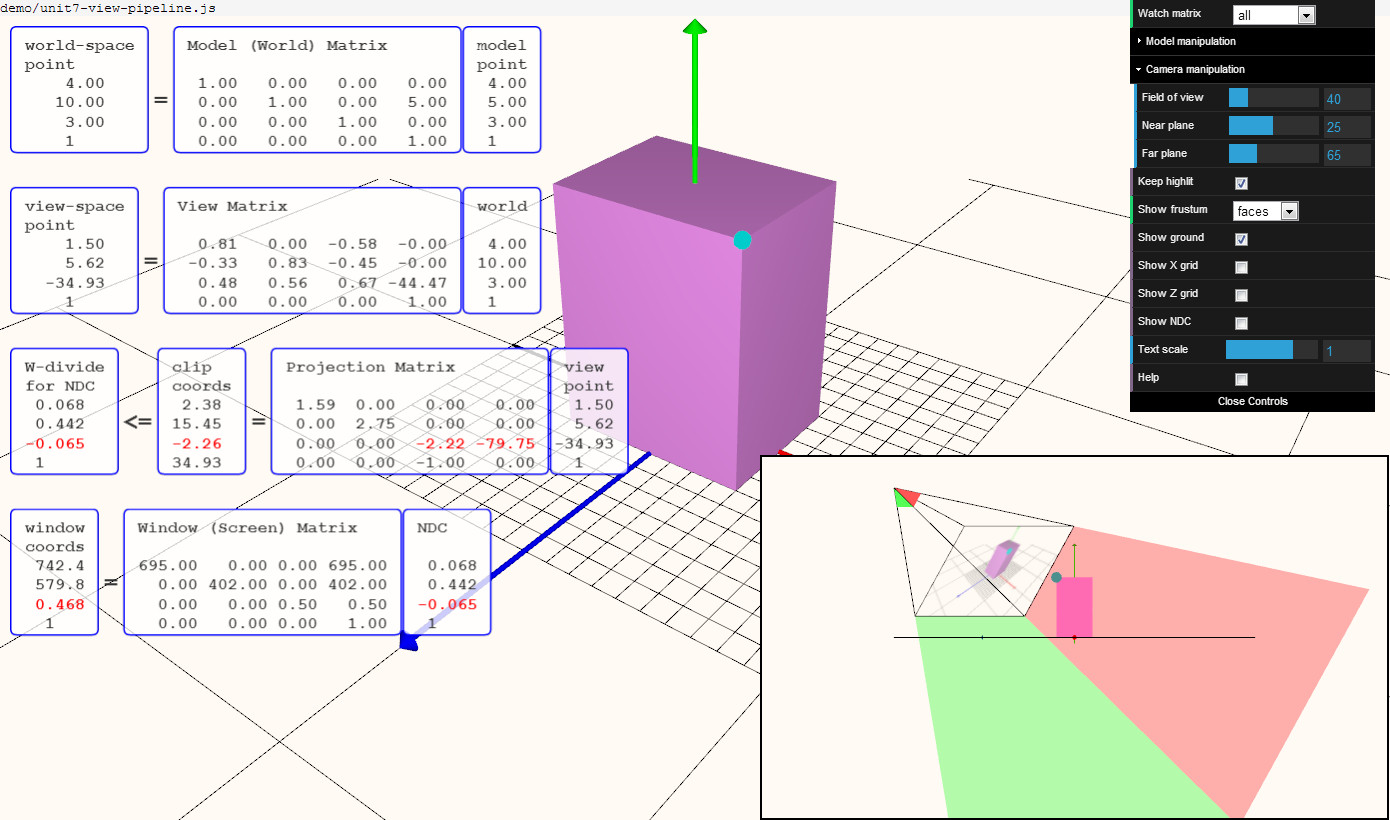
First, something about me and my course. I’m the coauthor, with Dave Shreiner, of the textbook Interactive Computer Graphics, which is now in its seventh edition. It has been the standard textbook for in computer graphics for students in computer science and engineering. For the seventh edition we switched from OpenGL to WebGL, which has turned out to be an excellent decision. We’ve also done both OpenGL and WebGL SIGGRAPH courses, which are now on Youtube at SIGRRAPH U. Given the explosion of interest in WebGL over the past year, I decided to do a MOOC using WebGL. For those of you unfamiliar with WebGL or interested in what I do in my academic course, there’s lots of sample code here that was also available to the students in the MOOC.

What we teach under the title of Computer Graphics can be very different depending on the audience. For those in the application world, such as the CAD community, who want to use computer graphics at a high level and not worry about writing shaders (or even knowing about shaders), three.js is a powerful tool built on top of WebGL. Users of three.js can reap many of the advantages of WebGL without writing a single line of WebGL code. On the other hand, students in Computer Science and Computer Engineering focus on “what’s beneath the hood”: shaders, algorithms, architectures. The two MOOCs, Eric’s and mine, are completely complementary and pretty much at the same level.

Course Outline

A fundamental premise of my 30+ years of teaching computer graphics is that students should be able to write complete applications as early as possible. While this philosophy is fairly common in university courses, it very uncommon in programming MOOCs. There are many reasons for this. The two key ones are the time needed to do a complete program and the problem of grading thousands of assignments. Nevertheless, I did not want to teach the course unless I could require complete programs, each one satisfying a set of requirements.

Because WebGL runs in all recent browsers, students needed only have access to a public website where they could put their assignments. Then they only had to submit the URL to let the graders run the code and see the source. I referred the students who did not have public websites to codepen.io. This mechanism worked wonderfully. The fact that the applications were on public sites never became an issue.

Here are the five assignments,  with some student postings folded in:

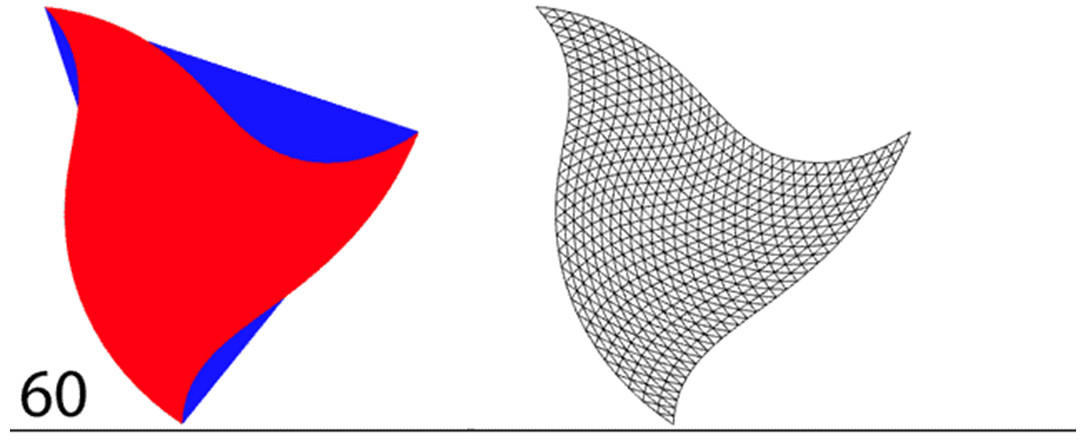
1. Tessellation and Twist: Twist is rotation, where the amount of rotation depends on the distance from the origin. It is can best be done in a vertex shader. The assignment starts with a single triangle centered at the origin. Twist applied to its three vertices does not result in a very interesting display. However, if we tessellate the triangle by recursive subdivision, the vertices of the smaller triangles are different distances from the origin, which creates a display in which the filled triangles have a curved outline. I give them some examples so that they need not write a lot of code to do this problem. It not only serves as test as to whether they have sufficient background for the course, they get to see what even a simple shader can do.

course1

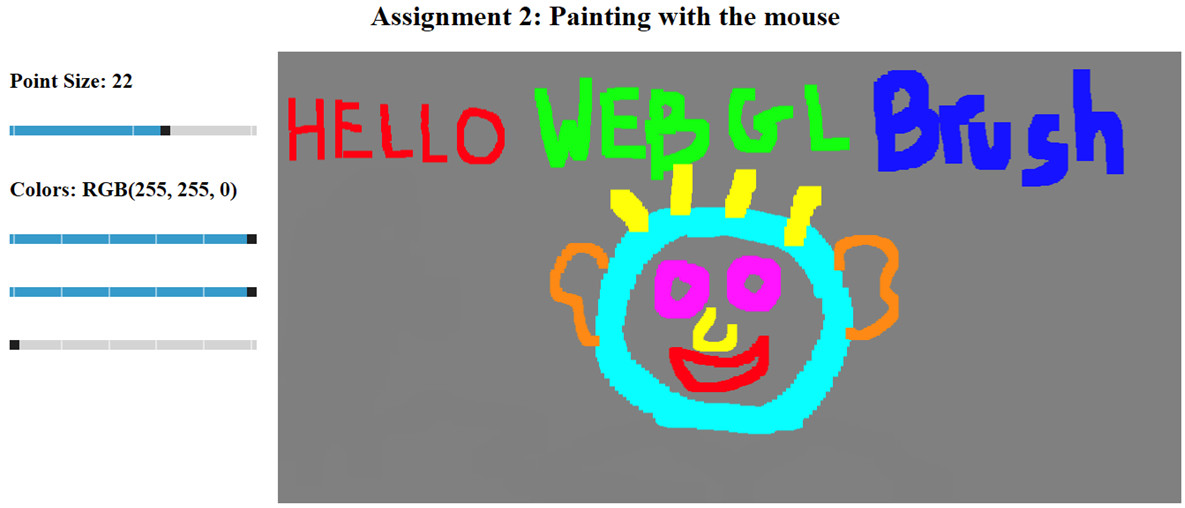
2. Line Drawing: The minimum requirement was to create an application that rendered line segments following mouse clicks. There were many options, such as letting the user change the line thickness via a menu. The main goal was to bring in interactivity through event listeners and involved both JS and a little HTML5.

course2

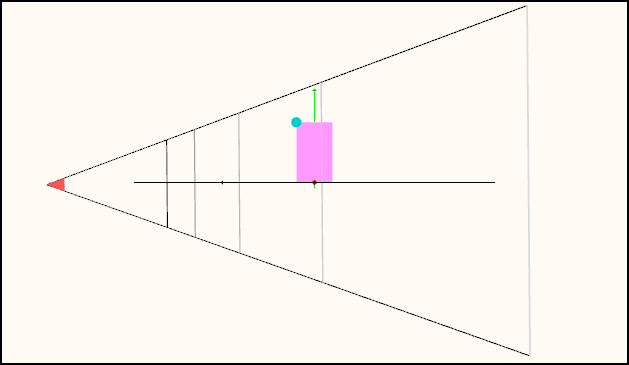
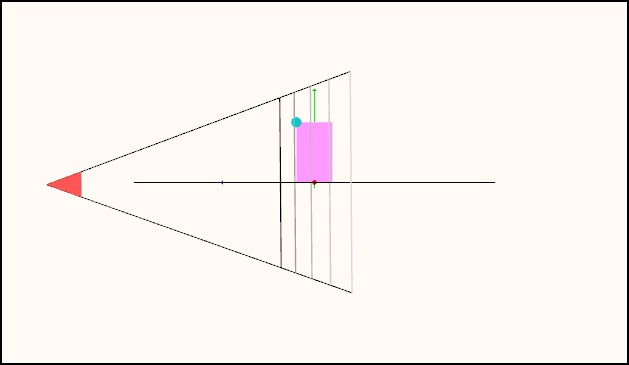
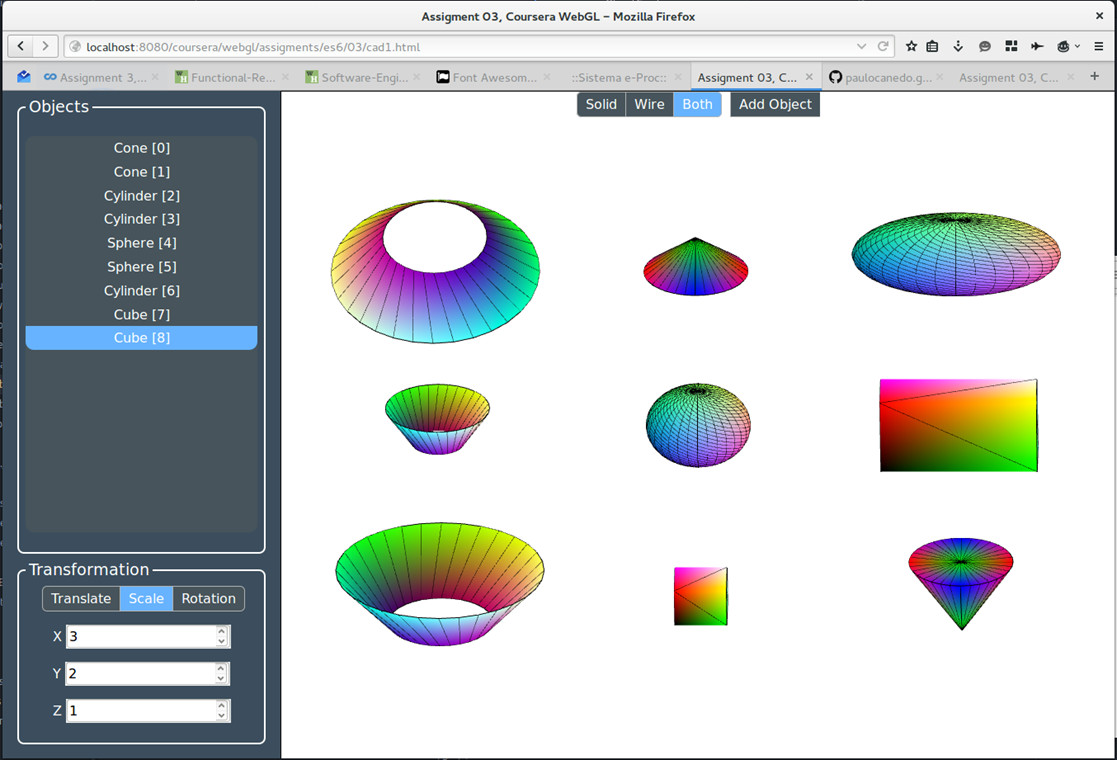
3. A Mini CAD system: Create a scene by adding objects to a scene. Minimally, the application had to have two object types and the instance transform was to be determined interactively. There was code available for spheres and cubes but they were encouraged to add cylinders and/or cones. Because we had yet to cover lighting most students built applications that rendered each 3D object twice, once filled and once with lines.

course3

4. Adding Lighting: Students had to write shaders to add lighting to their CAD systems. They were encouraged to compare implementing per-vertex lighting with per-fragment lighting.

course4

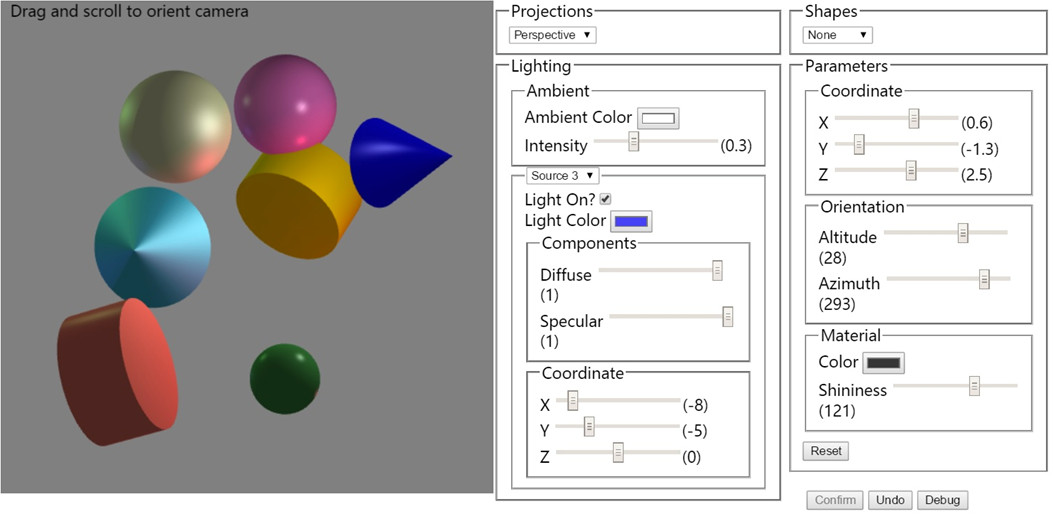
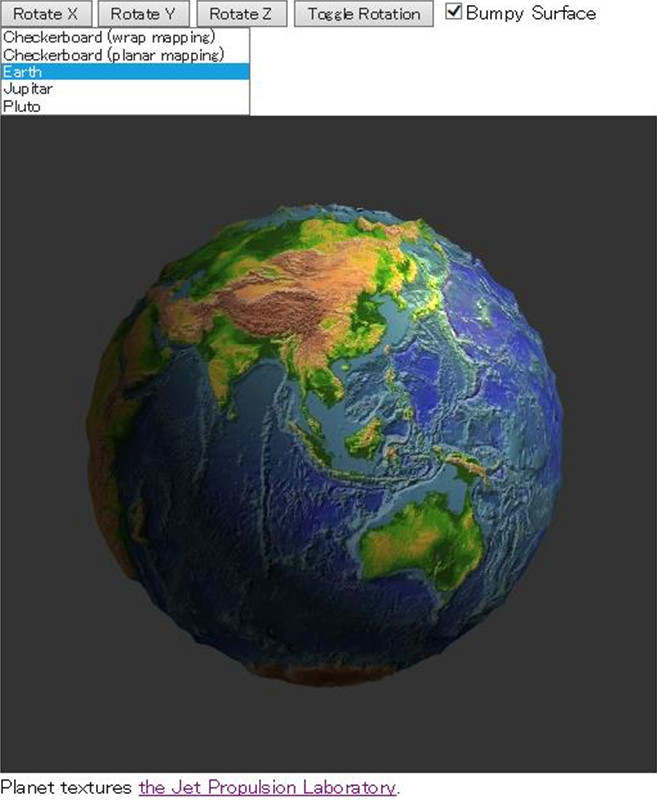
5. Adding Texture Mapping: Applications had to add textures to a sphere. They were asked to use both an image and a generated checkerboard pattern as textures and to use two different methods of assigning texture coordinates.

course5

Assignment 3 proved to be more difficult than I anticipated and if I did it again I’d probably eliminate or simplify Assignment 2 and simplify Assignment 3. Students who went through the whole course loved the last couple of assignments and the freedom they had to experiment. They even created web pages to share their results. See screen shots here.

The Numbers

Initially about 14,500 signed up for the course. However, only 5,500 ever watched even the first video. I still can’t figure out why 9,000 would sign up and then never even take a look. After the first week, I had about 2,500 remaining. Fair enough, since the first week’s videos enabled them to see if the content was what the wanted and if they had the time and background to continue.

Of the remaining 2500, about 1000 went through all the videos. Many of them did at least some of the projects, or even all of them, but didn’t care about getting a certificate. In the end, 282 participants earned certificates, including, I believe, all the ones who paid for a verified certificate.

I don’t know what is the best way to evaluate these numbers, Certainly using 282 out of 14,500 makes little sense. Personally I prefer 1000 out of 2500. The 2500 represents people who really were interested and the 1000 went all the way through in one way or another.

Working with Coursera

My institution, the University of New Mexico, was one of the first public institutions to partner with Coursera. Having followed Eric’s course and his blog about doing a course with Udacity, I was curious about the differences. And there are many. Perhaps the most significant is that Coursera leaves virtually all the course development and support to the partner institution. Since UNM, like most public institutions, is under considerable financial stress, the course was pretty much a do-it-yourself (unpaid) venture. With the exception of 2-3 minute videos we recorded on campus to introduce each week’s lessons, I recorded all the videos on my iMac with Camtasia. These were later minimally edited by UNM’s Extended Learning staff. As weird as it may seem, one can actually get pretty good at giving an animated presentation talking to your computer. I had a similar experience to Eric in finding that making changes to a video is extremely difficult. Since the each video is fairly short, I learned to just rerecord a video instead of trying to cut and paste within an existing one.

The major problem I had was dealing with Coursera’s software. Some crucial parts, such as keeping the courses available 24/7 and managing the discussion forums, worked really well. However, there were many other problems that ate large amounts of time, both mine and the students’. These included lack of and bad documentation, unannounced changes to the website, rigidity of the software, and unresponsiveness to problems. It was interesting that many of the students were aware of these issues from previous courses but still were taking many MOOC courses.

MOOCs and Professional Development

If I compare my course to my (or any) regular academic CS course, it’s not even close in academic content. How can it be otherwise when there’s no book allowed, there’s a lower level entry requirement, and not enough time to assign the amount of work we would expect in an academic course?

As a professional development course, it’s more interesting. I’ve taught well over 100 professional development courses, both in person and online, to audiences ranging from the twenties to the hundreds. The majority were in a concentrated four-day format. I realized after I had finished the MOOC that the hours of video in the MOOC were very close to the amount of lecturing I would do in an intensive four-day course. But I also realized that the MOOC is a superior method for professional development. Besides the fact that it is essentially free, the material is spread over a longer period, allowing participants flexibility in when they learn and giving them time to do serious programming exercises. Looking at the analytics available from my course, it’s clear that the vast majority of the learners have figured this out and are there for professional development.

Why are State Universities and Colleges doing MOOCs?

My experience, reinforced by talking to participants and other MOOC instructors, led me to question why UNM or any state institution is involved with MOOCs. While I can understand the desire to try new educational methods and the idealism that many of us believed would enable us to provide first class technical education to the developing world, two things should have pretty obvious from the beginning. First, the business model under which we have done our MOOC courses makes no sense; there had to a lot of self-delusion to believe that verified certificates would bring in enough money to cover our expenses. Out of 14,500 “learners” who initially signed up for my course, all of 200 signed up for verified certificates, generating $10,000 in revenue, revenue that is shared between Coursera and UNM. That’s not going to pay even minimal costs.

What’s more troublesome is that MOOC courses are not academic courses. They’re not even close. So why, when public institutions are facing all kinds of financial problems to support their own students, are they putting resources into professional development courses for people outside of their own regions? Some institutions have recognized this problem. I note that many of the offerings by Coursera are now coming from self-supporting Continuing Education/Professional Development units of Universities and not from the academic units.

MOOC Computer Programming Courses

There’s a level of delusion that I’ve seen with almost all MOOC programming courses (Coursera, Udacity, Code.org, Khan, Codecademy). These courses claim to teach a programming skill in a few weeks with the learner spending only a few hours a week. What happens in these courses is that the learner never writes a complete program but rather changes a line or two of code or adds a few lines to an existing program. Easy to check and grade by computer but in the end the student cannot write a complete program using her new skill but is deluded into believing she can. After all, she has a certificate of completion; often for many such courses. This becoming a serious and more widely recognized problem in the real world, which is getting filled with “programmers” who can’t program but have been told they can based on their experience with online courses.

When I decided to do my MOOC, I was adamant that it would require participants to design complete programs from a set of specifications. In spite of the clear prerequisites for the course, a majority of the participants could not even get started on the simplest of my assignments, one that could have been done by changing four or five lines of code in an example I gave them. Most of them couldn’t even take the problem statement and figure out that this was all they had to do. On the other hand, the participants who came in with real programming experience absolutely loved the course and did some remarkable work. Through the discussion forums I was able to establish relationships with a number of these students and these interactions were as rewarding as any in my 40+ years of teaching computer courses.

How I Would Do It Again If I Were To Do It Again

There’s a lot of if’s here but it’s conceivable that I might, with adequate support this time, do it again. It would involve almost as much work the first time since I’d rerecord the videos but what I have in mind might be a step towards a more stable MOOC that could break down some of the barriers between academia and professional development. I see the MOOC as remaining at 10 weeks with much the same outline. I’d start it at the same time as an academic semester. Students who want academic credit would also register for my regular online computer graphics class. All students would use the MOOC videos for the first 10 weeks but those registered for the University course would have additional reading and variants on the MOOC programming assignments. I would also meet with these students either live or via video conferencing, thus making the course more of a flipped classroom. After the 10 week MOOC was over, I would continue working with the university students on projects and advanced topics for the rest of the 15 week semester.

In addition, if the University could figure out how to do this and what to charge, I’d open the academic course to students outside the university who could take the course as non-degree students at a reduced tuition. Such credit would be transferable to other academic programs. Exploring such a format might move us in a direction that helps state institutions with their financial issues, leads to a working business models for MOOC providers, and at the same time, fulfills many of the idealist goals that many of us have for MOOCs.

SIGGRAPH 2015: Calendars and Unlisted Events

Get them: http://skitten.org/2015/07/siggraph-2015-google-calendars

As of this moment it’s missing our own event Sunday, but you’re all coming to that anyway, right? I also believe there are one or two parties not listed, such as the Chapters Party.

Oh, and there’s an informal WebGL meetup Saturday night (tonight!) at the bar by the pool at the Figueroa.

Time to get on the plane – see you there!

Why use WebGL for Graphics Research?

guest post by Patrick Cozzi, @pjcozzi.

This isn’t as crazy as it sounds: WebGL has a chance to become the graphics API of choice for real-time graphics research. Here’s why I think so.

An interactive demo is better than a video.

WebGL allows us to embed demos in a website, like the demo for The Compact YCoCg Frame Buffer by Pavlos Mavridis and Georgios Papaioannou. A demo gives readers a better understanding than a video alone, allows them to reproduce performance results on their hardware, and enables them to experiment with debug views like the demo for WebGL Deferred Shading by Sijie Tian, Yuqin Shao, and me. This is, of course, true for a demo written with any graphics API, but WebGL makes the barrier-to-entry very low; it runs almost everywhere (iOS is still holding back the floodgates) and only requires clicking on a link. Readers and reviewers are much more likely to check it out.

WebGL runs on desktop and mobile.

Android devices now have pretty good support for WebGL. This allows us to write the majority of our demo once and get performance numbers for both desktop and mobile. This is especially useful for algorithms that will have different performance implications due to differences in GPU architectures, e.g., early-z vs. tile-based, or network bandwidth, e.g., streaming massive models.

WebGL is starting to expose modern GPU features.

WebGL is based on OpenGL ES 2.0 so it doesn’t expose features like query timers, compute shaders, uniform buffers, etc. However, with some WebGL 2 (based on ES 3.0) features being exposed as extensions, we are getting access to more GPU features like instancing and multiple render targets. Given that OpenGL ES 3.1 will be released this year with compute shaders, atomics, and image load/store, we can expect WebGL to follow. This will allow compute-shader-based research in WebGL, an area where I expect we’ll continue to see innovation. In addition, with NVIDIA Tegra K1, we see OpenGL 4.4 support on mobile, which could ultimately mean more features exposed by WebGL to keep pace with mobile.

Some graphics research areas, such as animation, don’t always need access to the latest GPU features and instead just need a way to visualization their results. Even many of the latest JCGT papers on rendering can be implemented with WebGL and the extensions it exposes today (e.g., “Weighted Blended Order-Independent Transparency“). On the other hand, some research will explore the latest GPU features or use features only available to languages with pointers, for example, using persistent-mapped buffers in Approaching Zero Driver Overhead by Cass Everitt, Graham Sellers, John McDonald, and Tim Foley.

WebGL is faster to develop with.

Coming from C++, JavaScript takes some getting use to (see An Introduction to JavaScript for Sophisticated Programmers by Morgan McGuire), but it has its benefits: lighting-fast iteration times, lots of open-source third-party libraries, some nice language features such as functions as first-class objects and JSON serialization, and some decent tools. Most people will be more productive in JavaScript than in C++ once up to speed.

JavaScript is not as fast as C++, which is a concern when we are comparing a CPU-bound algorithm to previous work in C++. However, for GPU-bound work, JavaScript and C++ are very similar.

Try it.

Check out the WebGL Report to see what extensions your browser supports. If it meets the needs for your next research project, give it a try!

Improved Graphics Transforms Demo

With the holidays upon us, it’s time to hack! Well, a little bit. I spent a fair bit of time improving my transforms demo, folding in comments from others and my own ideas. Many thanks to all who sent me suggestions (and anyone’s welcome to send more). I like one subtle feature now: if the blue test point is clipped, it turns red and clipping is also noted in the transforms themselves.

The feature I like the most is that which shows the frustum. Run the demo and select “Show frustum: depths”. Admire that the scene is rendered on the view frustum’s near plane. Rotate the camera around (left mouse) until it’s aligned to a side view of the view frustum. You’ll see the near and far plane depths (colored), and some equally spaced depth planes in between (in terms of NDC and Z-depth values, not in terms of world coordinates).

side

Now play with the near and far plane depths under “Camera manipulation” (open that menu by clicking on the arrow to the left of the word “Camera”). This really shows the effect of moving the near place close to the object, evening out the distribution of the plane depths. Here’s an example:

side2

The mind-bender part of this new viewport feature is that if you rotate the camera, you’re of course rotating the frustum in the opposite direction in the viewport, which holds the view of the scene steady and shows the camera’s movement. My mind is constantly seeing the frustum “inverted”, as it wants both directions to be in the same direction, I think. I even tried modeling the tip where the eye is located, to give a “front” for the eye position, but that doesn’t help much. Probably a fully-modeled eyeball would be a better tipoff, but that’s way more work than I want to put into this.

You can try lots of other things; dolly is done with the mouse wheel (or middle mouse up and down), pan with the right mouse. All the code is downloadable from my github repository.

Click on image for a larger, readable version.

transforms4