PANZAMAN'S BATTLEFIELD 1942 TANK TUTORIAL

Having played extensively as a tank commander in Battlefield 1942, I have put together some tips, plus data on the different vehicles' characteristics, to help the novice tank crewman to live a little longer (tips marked [Vim] were suggested by my team-mate [VtS]Vimeous).
The information is based on BF1942 version 1.2 and replaces my earlier TankData document (LarkumBF42TankData). Note that the general tips, but not specific numerical results, also apply to the major tank BF1942 mods such as the excellent MegaTank mod by DaCrapper.
I hope you find these tips useful – good hunting!
1. TACTICS
1.1. Philosophy
The general philosophy when commanding a tank in Bf42 is to be 'cautious without mercy'. Let me explain the two parts of that in more detail:
Cautious…
Firstly, you must advance very carefully to make sure you are not exposed. Your aim is to see them before they see you, and especially to fire first (the tank that achieves the first hit is usually the one that survives).
Secondly, you are trying to take on just one enemy tank at a time. If you race forward you can come up against two or more enemy tanks at once – and you will die. Take them on one at a time and you can win.
Thirdly, you want to have your strongest (usually front) armour facing the enemy before the first shot is fired.
…Without Mercy
Use every advantage afforded by the terrain. Hide behind any folds in the ground and, especially, make use of buildings to hide behind. Move out from cover to fire, then back in before they can return fire. In particular, aim to keep your particular tank's weak points covered (see section 3.3 below).
If possible repair yourself (even just a little) before you pop back out again. If they are close, and expecting you to come back out, go around the building and come out in a different place. – preferably behind them.
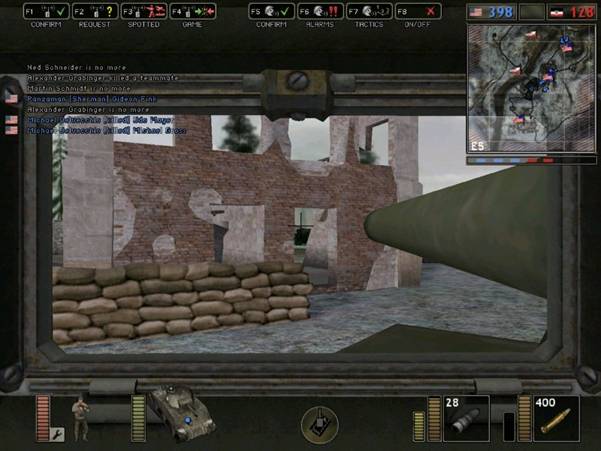
Use clumps of trees and gaps in buildings as ambush points (see picture). For example, on the Allied side my favourite ambush points are the building just east of the southern bridge in the Battle of the Bulge (as shown), the buildings just west of the eastern bridge in Kharkov and the small tree-covered ridge just north of the southern base in Kursk. (Other good ambush points are the dips next to bridges, e.g. in Bocage [Vim]).
Do not let infantry get behind you. If you see this happening, back up! Fire co-ax against any visible part of them, even just an exposed helmet or arm. Remember the co-ax fires straight, so it can be used to snipe at long distances.
Take no grief from artillery. They are vulnerable to co-ax fire (like APCs) so hit them with the main gun, then a full belt of co-ax while the main gun reloads, just in time to hit them again with the main gun. Follow up with another belt of co-ax if required.
When up against bots, there is a simple trick to stop infantry anti-tanks getting you with bazookas. Park so that you are facing at a sharp angle to them and every few seconds, or when you hear a bazooka firing, just jockey forward or back about 5m and they will miss.
In summary your aim must be to use every advantage you can and to give the enemy no quarter, no chance to get you back. It is possible to rack up a high score and dominate the battle when using these tactics. Furthermore, if you are an Engineer, it is quite possible to survive most of a game without ever losing your tank.
1.2. Gunnery
At typical battle ranges you can nearly always get a first round hit on an enemy tank by placing the bottom of your crosshairs on the join between the enemy’s hull and turret. Of course, at very short ranges you should use the centre of the crosshairs and at long distance you will need to aim up to allow for the projectile’s trajectory (which is very exaggerated in standard, i.e. unmodded, BF1942).
Learning to tell whether a distant shot has fallen short or long comes with experience, but essentially if you see earth thrown up then its short, and if you see the target silhouetted against a bright explosion then it went long. You will see just a puff of smoke on the target if you hit (plus, of course, your crosshairs will blink from v1.2).
When firing at an aircraft, a good first aim is just ahead of it with your crosshairs just touching it. For example, if it is flying left to right aim to touch its front edge (engine/propellers) with the left hand edge of your crosshairs.
Most tanks take time to recover from recoil before they are steady enough for another aimed shot. The recoil is worse when firing to the side so always try to fire towards the front [Vim].
The strength of a hit on your armour is affected by the angle at which it strikes, so a glancing blow causes less damage than a hit at right angles. You should therefore position your tank at about 30 degrees to the enemy to take advantage of this (any greater angle than this and you are adversely exposing your thinner side armour, plus see previous tip).
To avoid waiting for recoil to subside, fire as your crosshairs come back down through the target. Don’t fire as the crosshairs are returning back up as this will make the recoil worse [Vim].
Keep moving as much as possible to make yourself a difficult target. Even if the enemy just misses, you will only take damage from the splash rather than the strike [Vim] (and note that tank shell misses cause no splash damage to tanks).
When you have the range to the target remember the elevation of the crosshairs in relation to the surrounding terrain and use this to maintain your rate of fire despite the recoil [Vim].
If you can’t hit the enemy tank then blind him! Undershooting is better than overshooting as it will throw up earth and momentarily hide you [Vim].
When your tank is being hit by an AA gun (you
can tell this is happening because your health will go down quickly but
steadily) your main gun is ineffective against the flak gun shield – instead
either co-ax the AA gunner or try to get him with
splash from your main gun (e.g. target the sandbags next to him) [Vim]. Your
main gun can destroy the
1.3. Class
I always go as an Engineer class, for the following reasons:
1. Obviously, you can fully repair your tank at quiet intervals during the battle.
2. You can do quick repairs of your tank during 'cat and mouse' tank hunts, as described in Philosophy above.
3. In an all out slugging contest, you against another tank without significant cover, you can repair between shots while your tank is reloading. Yes, this is difficult, but it can mean you're the one left standing. It is most effective if you can estimate when they are likely to finish reloading and fire again (so you're back inside before then!). Remember it’s E to get in and out of the tank, and left mouse button to fire and repair, so it’s just a case of alternating E and LMB.
4. You can lay mines and so channel enemy tanks the way you want them to come (e.g. into an ambush position).
5. You can pick up mines laid by the enemy to catch your tank.
6. If I am caught out of my tank and it's destroyed (e.g. while I'm trying to repair it) then, if the enemy tank is close, I'll aim to reach cover, circle round and ExpPack it (3 on the engine deck will finish it). If it sees you and tries to run you down, let it (just back off slowly and drop a few mines as you go). If it tries to machine gun you, hit the deck and continue – remember the co-ax cannot be brought down low close to the hull.
Some people swear by the Anti-Tank class, even jumping out of their tank between rounds to fire a bazooka at the enemy tank, but I think this shows a lack of confidence in their ability to use the tank and to keep it alive – give me the Engineer class every time.
Whether or not you are an Engineer, use repair pads and hangars at every opportunity to repair your vehicle. They are especially useful to sit on when in a fire-fight, such as when your base is being attacked or you've penetrated their base.
1.4. Team Play
Tanks are most effective when advancing together and cooperating.
Two or more tanks moving up together present a formidable threat to an enemy position, and can overwhelm any single enemy tanks encountered.
Use one tank to provide protection while the other is being repaired [Vim].
Make good use of the enemy target radio signals (Enemy armour spotted, enemy aircraft spotted, etc.). For example, if you come over a rise and see three enemy tanks then hit the ‘enemy armour spotted’ signal three times (and maybe an extra time if one is a Tiger!). As well as indicating enemy strength better, your position will be highlighted on the map for longer.
Use artillery to ‘walk’ into a target area to blast away bazooka men. Follow up with tanks to form a bridgehead ready for the arrival of reinforcements [Vim].
2. GENERAL INFORMATION
2.1. Controls
I use the default keys for operating a tank. However, I have the mouse control for Land vehicles at maximum so that I can traverse the turret as fast as possible – note that this makes fine control for lining up on a target harder, so practise, and find the best setting for yourself.
Different tanks traverse at different speeds so use this to your advantage – the Tiger is slowest of all [Vim].
2.2. Taking Over A Tank
Often a bot will get to a tank before you and take it. Of course, if you hit 'E' you can get into the upper MG position and then through quick tapping on the '1' key you can often replace the bot.
This is a tricky problem if the tank has two bots in it as hitting 'E' doesn't usually have any effect. However, I have found that often – it's not guaranteed – you can eject one of the bots if you jump up in the air next to the hull, towards the turret, as you press the 'E' key. Don't ask me why this works!
2.3. Damage Indication
Keep track of the condition of the enemy tank so you can make a calculated decision to continue an engagement or disengage. When a tank's armour drops below 50% it will start to smoke. Furthermore, the colour of the smoke appears to indicate the degree of damage – white smoke down to about 40%, grey smoke down to about 30% and black smoke below 30%.
2.4. Spontaneous Destruction
When a tank's armour drops below about 10% it starts to self destruct, i.e. the armour drops to 9%, 8%, and so on very quickly, and the tank explodes at 0%. While self destructing the tank will become immobile. Note that if your tank suddenly stops moving or responding to your driving commands then it has probably begun to self destruct and you have not got long to get out and repair it or escape to a safe distance!
If the armour can be repaired to 10%+ by an engineer then self destruction can be avoided. As a general note, a 'fully-charged' engineer is able to repair an armour value of about 80%.
When a tank is abandoned it usually self destructs after a minute. At 55s it will start to smoke and catch fire, and will explode at 60s (sooner if already damaged). However, it appears that sometimes an abandoned tank won't self destruct if near a tank spawn point (even if not the one at which it spawned).
2.5. Reload Times
Obviously the faster a tank reloads the better so it is useful to know how long you're going to have to wait before you can fire again – and whether the enemy will be ready first.
The reload time for each tank was determined by simply measuring the time to fire 11 rounds (i.e. 10 reloads), when holding down the fire button continuously, and dividing by 10.
· M10/Tiger: 4.0 seconds
· Panzer IV/Sherman/Chi Ha: 2.9 seconds
2.6. Mines
If a mine explodes under you it will always kill you. As discussed above, if you are an engineer you can defuse it. However, don't forget a mine won't explode if tou drive over it slowly enough.
3. ARMOUR PENETRATION
3.1. Summary
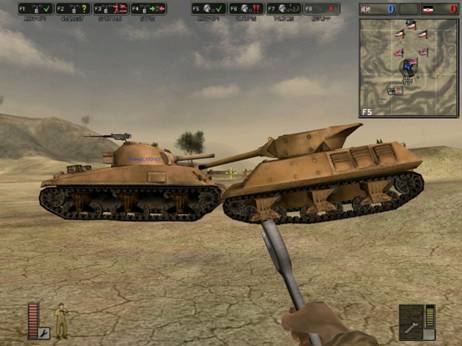
I have conducted careful tests on the German and Allied vehicles to determine their effectiveness when firing against each other (see screenshot). For those who aren't interested in all the details (which are given in the Appendix at the end), the tanks have the best armour in the following order:
1: Tiger (since Bf42 v1.2, previously the same as the M10),
2: M10,
3: Panzer IV,
4:
5: Chi Ha
Generally they have the best guns in the following order (but see details below):
1: M10,
2: Tiger,
3: Panzer IV/Sherman/Chi Ha.
In other words, I would say the M10 is the best vehicle overall (particularly as it does not have the strange exaggerated recoil and instability of the Tiger), but note reload times above.
3.2. Discussion
The
Panzer IV and Sherman are very similar in armour, except that the
However,
each tank's ability to penetrate other tanks appears to be inconsistent. For
example, an M10 takes much fewer to kill a Tiger than a
All figures are approximate, of course, as it is very difficult to know exactly where a round hits. In particular, the Panzer IV seems to be out of scale with the other tanks (it's even bigger than the Tiger!) so when firing at other tanks, or being fired at, the relative heights of the vehicles may mean that a hit aimed at the side of the hull may occur on the side of the turret or even on the top of the hull. Similar problems occurred with the small Chi Ha, occasionally producing different results, probably because the relative angles produced a glancing strike.
Note that there appears to be no correlation with historical fact, as in the game the low-velocity 76mm gun of the M10 is far more effective than the high-velocity 88mm gun of the Tiger, and the 47mm gun of the Chi Ha has a similar performance to the 75mm guns of the Sherman and Panzer IV.
3.3. Weak Points
Many of the tanks have a weak point coded in for them where a hit costs more than the usual amount of armour points, presumably to make game-play more interesting. The weak points I have found are as follows (by 'nose' I mean the very lowest part of the hull front):
Sherman and Panzer IV: Nose – about 10 points more than rest of the hull front
Chi-Ha: Nose – about 20 points more than rest of the hull front
Tiger: Suspension – up to 30 points more than rest of the hull side
Knowing about the Tiger's weak point is especially useful – not just because the Tiger is the hardest tank to kill but because hitting its weak point is so effective.
4. HISTORICAL ACCURACY
Battlefield 1942 is first and foremost a game, not a simulation, so pedantic criticism is pointless. However, it is very impressive in many aspects of its representation of tank fighting so it is appropriate to point out some of its more obvious errors (if only in the hope of having them corrected in a future patch or release). As well as those already mentioned above, these are:
· The tanks in the game all fire high explosive shells exclusively, whereas in reality tanks fight other tanks with armour piercing solid shot. This is why in the game tanks have to fire up in the air like artillery howitzers whereas they should fire in generally straight lines more like the co-axial machine gun, at least at typical battle ranges (the obvious exception being the model of the Panzer IV depicted in the game which is actually armed with a short-barrelled howitzer for infantry support). Perhaps the game should use a single key (or mouse wheel) to switch between shell and shot.
· Even though the tanks appear to fire high explosive, the effects of the shells bursting on infantry is minimal, which is what you would actually expect from the impact of shot.
· Tanks in reality are largely impervious to high explosive whether fired from another tank or from artillery, and are immune to hand grenades.
· The tanks in the game are labelled as light and medium tanks, but there are no light tanks in the game – only medium and heavy tanks.
· The Tiger tank is the heaviest tank in the game (and one of the heaviest in the war) but has been given the recoil and instability characteristics of a very light tank.
· The tank labelled in the game "T34" is actually a very good depiction of a T-34-85. The tank labelled "T34/85" is made up – it has the approximate gun barrel length of a T-34-76 but in a T-34-85 turret.
(I have just got into modding for BF1942 so you may soon see a mod coming out with my name on it that fixes some of these issues!).
Notwithstanding the above, Battlefield 1942 is an excellent game and Digital Illusions are to be congratulated for producing a game that combines some good historical and technical representation with excellent gameplay. It is hoped that using the information given in this data file may help any budding tank commanders to live a little longer!
If there is interest in extending the data to consider the T‑34 tanks or other vehicles, or for general discussions concerning this data file (particularly from those with the patience to verify and/or correct the data), please drop me a line at:
trevor-larkum@armourarchive.co.uk
My thanks to [VtS]Vimeous and Carin for their help in compiling some of the tank
vs. tank data. Thanks also to
Finally, if you are interested in finding out about the real tanks depicted, particularly if you want to find out about preserved examples you can visit, please see my website at:
Panzaman
A.k.a.
Trevor Larkum
Ex-troop leader, Royal Tank Regiment
APPENDIX: HITS
REQUIRED FOR A KILL
4.1. Results
The main value in each box is the minimum
number of hits required to destroy a tank that starts with 100% armour; the
value in brackets is the actual armour percentage subtracted by each hit. Kills
achievable with 1 or 2 rounds are highlighted in red and amber respectively.
Note that these figures are hitting “standard” spots on each tank, not hitting
the weak points discussed in Section 3.3.
|
Turret |
|
||||
|
Front |
Side |
Rear |
Front |
Side |
Rear |
|
|
|
3 (40) |
3 (40) |
2 (85) |
3 (35) |
2 (50) |
1 (95) |
|
Panzer
IV |
3 (40) |
3 (40) |
3 (40) |
4 (27) |
2 (50) |
2 (85) |
|
M10 |
10 (10) |
10 (10) |
10 (10) |
10 (10) |
4 (25) |
2 (50) |
|
Tiger |
12 (8) |
12 (8) |
12 (8) |
12 (8) |
5 (20) |
3 (40) |
|
Chi
Ha |
2 (50) |
3 (40) |
1 (100) |
5 (20) |
2 (50) |
1 (100) |
|
Panzer IV attacking: |
Turret |
|
||||
|
Front |
Side |
Rear |
Front |
Side |
Rear |
|
|
|
3 (40) |
3 (40) |
1 (~90) |
3 (35) |
2 (50) |
1 (95) |
|
Panzer
IV |
3 (40) |
3 (40) |
3 (40) |
4 (30) |
2 (50) |
1 (95) |
|
M10 |
10 (10) |
10 (10) |
10 (10) |
10 (10) |
4 (25) |
2 (50) |
|
Tiger |
12 (8) |
12 (8) |
12 (8) |
12 (8) |
12 (8) |
3 (40) |
|
Tiger |
Turret |
|
||||
|
Front |
Side |
Rear |
Front |
Side |
Rear |
|
|
|
4 (30) |
3 (40) |
2 (77) |
3 (35) |
2 (77) |
1 (100) |
|
Panzer
IV |
3 (44) |
3 (44) |
3 (44) |
3 (35) |
2 (77) |
1 (100) |
|
M10 |
5 (20) |
5 (22) |
5 (20) |
5 (20) |
3 (33) |
2 (75) |
|
M10 |
Turret |
|
||||
|
Front |
Side |
Rear |
Front |
Side |
Rear |
|
|
|
3 (35) |
2 (52) |
1 (95) |
3 (43) |
1 (93) |
1 (100) |
|
Panzer
IV |
2 (52) |
2 (52) |
2 (52) |
2 (56) |
1 (93) |
1 (100) |
|
Tiger |
5 (20) |
5 (20) |
5 (20) |
5 (20) |
3 (31) |
1 (93) |
|
Chi
Ha |
Turret |
|
||||
|
Front |
Side |
Rear |
Front |
Side |
Rear |
|
|
|
3 (40) |
3 (40) |
1 (100) |
3 (32) |
2 (50) |
1 (100) |
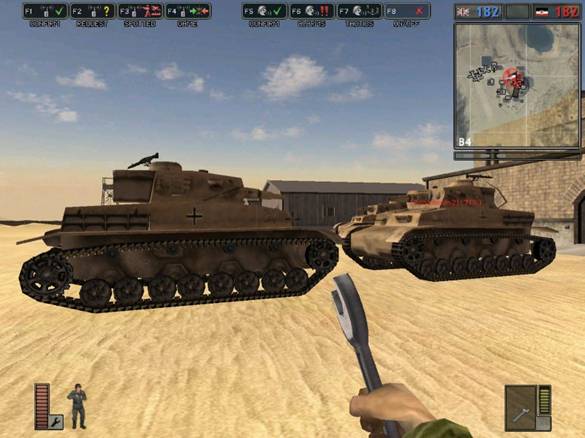
4.2. Method
The values were determined by firing one tank point blank against the other when positioned at right angles to the armour (see screenshot above). This was done by using two computers networked together playing Operation Battleaxe (CTF), El Alamein (Conquest) or Wake Island (CTF), and both playing on the same side so that the current armour state was visible as a numerical percentage. Note that these are the maximum armour damage values achievable (i.e. minimum hits required) since the armour damage is significantly reduced both with range and with the angle of incidence to the armour.
When the armour value is reduced below 10% this is considered to be a kill (see Spontaneous Destruction above).
Where it was found difficult to bring the gun down enough to hit the other tank's hull, the terrain was used to angle the whole vehicle down (see screenshot below). This avoided any reduced damage values resulting from increasing the distance between vehicles. It is unlikely that any effect from the relative vertical angle is significant.