Battlefield 1942 Tips and Tactics
The best single tip: You can add yourself to your buddy list (type "~ab yournumber", or select yourself on the voting screen and hit the add button) to better see when you kill someone - your kills show up in green. You need to add yourself only once and it then works forever. (from JackTripper)
These are a bunch of tips and tactics I've learnt about the game, by reading forums, watching others play, and experimenting. I'm assuming you have a knowledge of the rules, EA Games' Tips and Strategies page (though I repeat a few of these), and the mechanics and tactics sections of my FAQ. Some are obvious (unless you don't know them), others truly obscure; I hope they're entertaining and informative. A number of the tips are derived from my weapons effect charts and Giant Grid O' Death. Many tips are really two-sided: the tactic is given, and it's up to you to figure out the way to combat the tactic when it's used against you.
If you want to add, question, or otherwise comment on this page, please write me at erich@acm.org. Please keep your tip suggestions succinct. For example, I could write a long, rambling paragraph on defending control points at Stalingrad, but really it would just be an amalgamation of a number of tips here. Any tips you send in that I use will be credited to you. I've tried to credit tips to whomever first posted them, but there's lots here that I don't know the origins of or forgot to credit. Long and short: I'm just the collector, not the originator, of most of these tips.
Infantry
- Keep moving! Zig and zag! Otherwise snipers will pick you off, or you'll be killed due to lag. If you absolutely do have to stop, then lie down.
- You can walk through the posts holding up barbed wire (but take damage, of course). Barbed wire causes damage based on time in the wire, so always run through or jump over it. (from Wayne Miller)
- Map your pistol (i.e. Infantry, weapon #2) to the middle mouse button, the mousewheel click. A quick tap, and the pistol is selected.
- You can customize your weapon aiming color to something other than yellow (which is sometimes
hard to see in desert battles). Red's good.
- In an enemy building, consider first looking up/down the stairway, then walking backwards up/down the stairs. In this way you don't have to waste time turning around, if there's an ambush.
- As a sniper, keep the fire button held down after you snipe to remain zoomed in. This allows you to see where your shot landed. (To be honest, I never do - I just look at the messages to see if I made a kill or not.)
- As a sniper, you don't need to see the whole battlefield, as it can then see you. It's often safer to be able to see just some small killing zone.
- An ancient tip, but still ignored: don't snipe from where you show a silhouette against the sky. Hilltops bad, shallow gullies and in front of sandbags good.
- Lying down behind rocks, among bushes, or even behind a tree trunk can effectively hide and shield you. It is just plain hard to see people in amongst the clutter.
- Don't spot with binoculars straight down. It is a lot more helpful to get a wide view of the battlefield. (from Bartholomew Roberts)
- You can crouch and still move.
- You can go down a steep hill and not die by walking into (i.e. up) the hill on the way down. (from [H]Arrow)
- Better yet, you can go prone and start to crawl down a steep hill. You'll then slide the rest of the way down it, facing forward, and take no damage (at least for many hills - if the hill gets steeper halfway down, you'll die). (from John Lewis)
- Even better yet, start down a hill going forward, and when you start to slide, walk backwards. You won't take damage and will be facing the right direction. (from Zorkk)
- This walking backwards technique also works for jumping from buildings. If you're in a corner window and can jump so you smack your face against another building you can fall to the ground and take minimal damage, sometimes none. (from Zorkk)
- Entering the prone position makes you go faster when you're crawling. Try going in and out of the position real fast. If you do it right you'll scoot forward quickly without standing up. (from eggman|exp)
- When you are a medic you can see every teammate's health (a small percentage number next to their name).
- As a medic your healing abilities have a small "radius" around you, thus you can heal several people at once. You can also heal through walls. (from HollowPoint)
- When you are wounded and other wounded players are nearby, they will be healed first when you apply the medkit. (from HollowPoint)
- A fully discharged medic takes about 55 seconds to fully recharge. (from Wayne Miller)
- The flashing red cross icon appears on a person that requested a medic with "F6 F5", medics can see it on the minimap, and also the player's name above their head is flashing. (from HollowPoint)
- Same thing happens for engineers when a repair request "F6 F5" comes in. When a player requests an engineer a small wrench icon will appear. Engineers can see the health of friendly occupied vehicles. (from HollowPoint)
- Engineers can fix tanks, ships, etc., while still moving, so don't stand still. You can also repair when prone. You can see how damaged an occupied friendly vehicle is by looking at the player's name.
- Engineers quickly pick up mines (and expacks) by using the wrench and crouching (Control key) in front of the mine. The mine goes into your inventory.
- Mines last 6 minutes, disappearing after that. They also last half a minute after you die.
- If you see an engineer die and pick up his kit before it disappears, any mines and explosives he laid down will continue to exist. (from Ralph Wiggum)
- Getting close to an enemy vehicle and dropping a mine in front of it is an interesting and often effective way for an engineer to get a kill.
- Better yet, toss the mine right on the vehicle - it moves, it dies (though often you die, too).
- Some booby trap mine placements, such as on the B-17 and Tiger, are invisible to players.
For example: To mine a Spitfire, jump on the tail, and run up the fuselage. Crouch at the nose, and place a mine by one of the blades. When the plane begins to accelerate, the mine drifts back, and it explodes. Placing the mine on a wing, or behind the cockpit will not work. (from [-|-]Mr. Flibble)
- You can booby trap enemy tanks by putting mines on their treads. When they start to drive the mine rolls to the front of the tank. This takes some practice and works best on tanks that aren't moving, yet. (from eggman|exp)
- You can booby-trap the Natter in Secret Weapons by putting a mine on the track. You cannot put it in the "V" groove, it needs to be high on the rail. You can also easily hide exppacks in the rails. (from DrewatOrigin)
- If you mine a choke point, also drop some explosive packs around. Tanks will slow down if they see the mines; set off the expacks.
- It's plenty of fun to drop expacks in the repair pad grills and wait...
- If friendly fire is off, you can also drop mines on repair pads without worries. (from JackTripper)
- Landing craft are extremely unlikely to set off mines on a beach. Also, mines sink in water.
- However, you can booby-trap enemy landing craft on a ship by tossing a mine on the floor in the rear. When the landing craft moves, it will blow up and kill its occupants. (from {BHRD}RCT.-hb)
- You can place a total of 9 mines and 9 explosive packs. If you place more, the previously placed ones disappear. (from Wayne Miller)
- Explosive packs last 4 minutes, blowing up (and potentially killing you if friendly fire is on) when they expire. They disappear when you die.
- Explosive packs work through all walls except solid concrete.
- Engineers can repair 100 hitpoints of damage. A fully discharged engineer takes about 80 seconds to fully recharge.
- In Objective Mode games, the obvious choice is to be an engineer as an Allied objective attacker. Think twice: you can do a lot of damage by using grenades and by picking up kits of dead soldiers and using their explosives.
- While parachuting, you can drop mines and explosive packs, snipe, fire, heal, and even spot.
- You can control the direction of your descent, with or without your parachute deployed. Turn in the direction you wish to go; sometimes you'll need to turn a bit further to get going that direction.
- If you fly very high and then jump out, you can drop a considerable distance
away from where you jumped out, which opens up some stealth tactics. On El Alamein, for example, you can move almost four squares away from where you jumped out of a plane.
- Particularly entertaining is to parachute onto a tank and put expacks on it. If the driver jumps out to shoot, jump in. (from Von Schnopp)
- You're at the top of the windmill and you know they're coming for you up the stairs. Jump out and parachute (and come back in the bottom and surprise them). Leave an exppack if you can.
- You can parachute when jumping off of bridges. This beats dying on the bridges at Bocage, Market Garden, or Husky.
- To fire flak, ship, and tank guns as fast as possible, simply hold the left mouse button down. You'll fire instantly on reload. That said, you may wish to wait between shots for any recoil to die down.
- Flak guns damage vehicles, destroyers, people, etc. It is also often difficult for enemy vehicles to notice the flak gun is shooting at them.
- Use your ears when in a flak gun, as it's an excellent way to know which way a plane is approaching.
- The wasserfall can be aimed before launch, i.e. you can tilt its launch pad. Also note that the alternate fire button "fires" the wasserfall rocket in flight, shooting it forward even more rapidly into your target.
- While waiting for the wasserfall missile to reload, hit "C" a few times to see what's going on outside your facility.
- If you are flying a wasserfall rocket and see red flashes, and your rocket is not taking damage, then what is happening is that someone had damaged your rocket base. You could circle your rocket back and take them out before it's too late.
- You can drop (vs. throw) a grenade out of a window by right-clicking the mouse. Very handy at Berlin, Stalingrad, and Market Garden. If you right-click and hold, you can adjust how far you throw by how much "heat" builds up (try it and see!).
- You have a grenade in your hand, turn the corner, and see an enemy who sees you. Right-click drop the grenade where you stand and get back around the corner. Odds are the enemy will pursue you, and hilarity will follow. (from Oddball)
- If friendly fire is off, dropping a grenade at your feet in this way is also handy in hand-to-hand fighting.
- Start to throw and then jump to make your grenade go further. This technique also works with mines and explosive packs.
- Your accuracy is always the same when using the engineer's rifle (running, jumping, etc.).
- Otherwise, single shots are more accurate.
- You can crawl as an assault soldier and your accuracy stays the same.
- Otherwise, shots done when not moving are more accurate.
- Oddly, when you jump your assault gun's accuracy will briefly increase, then decrease.
- The lower half of the front of APCs and front and sides of artillery has armor that stops assault gun and machinegun bullets. Everywhere else these bullets cause damage. Less than three magazines from an assault rifle will blow one up. "Sides" is pretty liberal here - anything except dead-on at the bottom half of the front will damage these vehicles.
- Assault guns and machineguns do not damage tanks.
- If there are two machineguns in a machinegun nest, it's pleasant to fire one until it's overheated, then jump to the other and fire, etc. This also makes it a little harder for snipers to pick you off.
- Keep in mind that you need to see the tank only for the instant you fire your anti-tank weapon. Hide the rest of the time, if you can.
- You can play bullfighter with enemy jeep drivers. Make yourself visible to an oncoming jeep, then jump-toss a mine or shoot an anti-tank round at it when it comes to drive over you. If you're another class, just fire at the oncoming jeep and get ready to jump out of the way at the last second. (from eggman|exp)
- You can throw grenades all day by sitting next to an ammo supply box. Called "grenade spamming", people will curse at you.
- The knife attacks directly ahead of you (no slash occurs). A single poke in the head is an instant kill. (from Wayne Miller)
- Damage from the medic's gun, shotgun, and pistol fall off with distance, but do a minimum of 50% damage.
- If you're in fairly close combat situations (Berlin, Stalingrad), it can be worthwhile to aim for the head in firefights. Bullets to the head do about 60% more damage than those to the chest (though, of course, it is a smaller target area). Never aim for the waist on down, as bullets there do about 40% less damage than the trunk. (from Twinkletoes)
- Flags always take 10 seconds to turn from enemy to neutral, and from neutral to friendly. You know someone is contesting the flag if it takes longer. (from Wayne Miller)
- Note that the fog clipping plane is perpendicular to your line of sight and flat, not rounded. Therefore, you can see farther out of the corner of your eye rather than straight ahead. So, you can turn slightly to the left or right to look at something very far away. (from Wayne Miller)
Vehicles
- Think about driving around in the 3rd person view (hit the "C" key; hit it a few more times to return to the normal view). You get a wider field of view, can see a little of what's going on behind you, and can see over edges better (and so avoid mines).
- You can drive all vehicles over barbed wire without damage of any sort. You can even drive right through the wooden posts holding up the barbed wire.
- If you are going down a steep hill in a wheeled or
treaded vehicle, try aiming for the ground beneath it
squarely and simply put your foot down. Odds are you
will get down with very little damage done to you. (from Martin)
- You can drive through minefields if you go slow. Try to drive directly over a mine, otherwise your treads can move it forward with you. Use the last "C" key view to help see what you are doing. (Note: with the latest patch, I believe this is no longer true...)
- Never show the rear of your tank to the enemy; always try to hit the rear or sides of enemy tanks, if possible.
- In general, aim for the lowest part of a tank. The hull is generally more vulnerable than the turret, and the Tiger's and M10's treads are very weak. Thorough testing of tank vs. tank can be found in Trevor Larkum's tank data file.
- Try to hit a vehicle dead-on. Hitting at an angle lowers the damage.
- You can jump out of a moving jeep and take no damage (usually).
- You can usually blow up a tank by ramming a jeep or motorcycle into it at full speed. The vehicle slows down very rapidly if you jump out, so riding it out and taking a hit for the team is the most reliable way to make this work.
- If you load up the back of the jeep with expacks, the collision explosion appears to be more powerful in taking out the tank. (from Richard Brogdon)
- If you see someone about to ram your tank with a jeep, go into full reverse (while trying to shoot him, of course). The collision will then do much less damage to you.
- Even if a vehicle is full, you can still get a ride to the front by jumping onto it. (from eggman|exp)
- When a tank is smoking, it is more than half-dead. White smoke means up to about 60% damaged, grey means up to about 70%, black for more than this. (from Trevor Larkum)
- Killing tanks on repair pads can be tough. One dramatic tactic is to run into the tank with an APC, tipping it up. Jump out and shoot the underbelly (which, to be honest, is as vulnerable as the rear, but still...). (from Dracle)
- To get an extra shot while in a tank, consider being an anti-tank soldier. Fire tank, jump out and shoot A-T, jump in and continue to fire (the now reloaded) tank.
- An APC can often take a fair amount of damage from tanks. While the M10 and T35-85 heavy tanks can blow it up in one shot when hitting the weaker armor, the Tiger and bazooka needs two, medium tanks need at least three, and two exppacks or four grenades are the minimum. However, APCs are extremely vulnerable to plane machineguns.
- A Tiger or M10 tank cannot be destroyed in a single tank gun shot, though Allied heavy tanks shooting at the rear of a Tiger will get close.
- It is a myth that the Tiger tank is vulnerable to hits around its fuel tanks in the rear. Anywhere in the rear is good.
- Missing a tank with your tank gun usually does no damage. It may bounce the enemy tank around, but no actual damage occurs from the splash, with one known exception: rocks flying off of buildings do harm tanks (and everything else).
- An infantryman's worst nightmare is attacking a tank across a large, open expanse. Be that nightmare.
- A minor point: note that your tank's gun is to the right of your view of the battlefield. So, when you shoot at something close, you need to aim a bit to the left to hit it. Similarly, the flak gun is a bit to the left of your view, so when your target is close aim a bit to the right.
- While in a vehicle, hit "C" four times to see what's around you. Definitely remember this when you're a passive passenger in an APC.
- When a tank is attacking you, it's safer to be outside and on the far side of a bunker instead of inside.
- When you're a tank, if an enemy is in front of any concrete structure, aim high. If you miss the enemy himself, your hit on the concrete will create deadly fragments. (from <TGG> Loki)
- If you want to know who is manning a vehicle or ship, simply hit your position key again to see the names.
- If a vehicle is moved and then left unattended, it will eventually blow up.
- If you are not using a vehicle or plane, or it's heavily damaged, consider destroying it yourself so that it respawns at your team's areas sooner.
- On Capture the Flag, you can grab the flag without having to stop by having someone be in the back of the jeep without actually getting in.
- In addition to ammo and medical supplies for soldiers, the APC replenishes tank and artillery ammo when parked nearby. However, captured enemy APCs do not resupply friendly vehicles. (from Bartholomew Roberts and Wayne Miller)
- You can operate artillery effectively as a single guy by switching between positions using the 1 (driver) and 2 (gunner) keys. (from Bartholomew Roberts)
- Parking tanks or artillery next to an ammo box constantly replenishes it. For the katyusha (Russian rocket launcher on truck) you have to hop into the driver's position after firing all the rockets. Roll forward an inch and you are reloaded. (from Bartholomew Roberts)
- Katyushas have a serious damage area (better than standard artillery) and fire much faster (you can salvo all six so that they hit in seconds). (from Bartholomew Roberts)
- It is easier to target the katyusha's shots by going into third person mode, by hitting the "C" key.
- If you're shooting at unoccupied enemy equipment, consider not destroying it fully. If destroyed, most equipment respawns in less than a minute. Better to keep it alive and heavily damaged.
- Terrain matters when driving: vehicles driving on desert respond differently than those driving on roads, etc. (from Markus Mehring)
- In Secret Weapons and the Battle of Britain the jeeps and motorbikes have horns (just fire). Fun, but also useful to give your teammates warning that you're about to run them over. (from Markus Mehring)
Planes
- Consider setting the hat control of your joystick to change the view.
- You can resupply your plane by flying low and slow over its starting airfield. If you steal an enemy plane, you may not be able to resupply it.
- Planes' engines are their weakest point, so always shoot guns there (leading your target, of course). Note that the B17's and level bombers' engines are on their wings.
- When bombing, never point your plane to go further down immediately after dropping a bomb. You are likely to catch up with your own bomb and explode it.
- When strafing, aim a bit to the left or right so that one of the two streams of bullets actually hits what you're aiming at.
- Plane machinegun bullets are awesome against artillery and APCs (and jeeps, of course). 4 bullets to the top of an artillery piece and 7 bullets to an APC destroys it. They're also great against landing craft, which are best attacked from the rear.(from Markus Mehring)
- Plane machineguns are also handy against snipers. Many snipers love to get to the top of a tower or hill and stay stationary, making them good targets for a straight out strafing run. To make the game most memorable for the sniper, come at him from below along his line of sight. (from Markus Mehring)
- You can also check your minimap for occupied machine gun nests and strafe them from the rear. (from Markus Mehring)
- Watching what flak guns are occupied on the minimap also can help you survive. As a flak gunner, one simple counter to this is to stay out of the flak gun until the plane's within range. (from CrazyBri)
- You can repair the B17 in flight if you are an engineer in the top cannon position. You exit the plane onto the wing and repair, and hope the pilot doesn't barrel roll. (from PvtGuthrie)
- While flying, it's hard to lose an enemy on your tail. Instead, fly towards the nearest friendly flak gun and let them fix the problem. Drive erratically if you're alone, but if someone is in the tail gunner position then fly nice and smoothly and give him a chance to defend you. (from PvtGuthrie)
- There are other ways to escape pursuit. A series of tight turns can do it, flying through gullies or under a bridge can do it, and kicking back on the throttle at the right moment can do it.
- While pursuing another plane from the rear, consider keeping quiet and waiting for him to turn. It's difficult to shoot a plane down from the rear unless you're close; it's easier to rake the fuselage with bullets when the enemy's side is facing you.
- You can crash into the back wall of your hangar with your plane and come to a complete stop and take no damage - it's one way to land. If you hit a tank on the way in, of course, you're dead (and so is he).
- The hangar does not repair the B17 (3 person) bomber.
- Flying low over terrain makes it difficult for flak guns to shoot at you. (from eggman|exp)
- Flying low also keeps you out of range of the battleship's flak guns.
- Flying insanely low can also make pursuit by enemy planes difficult; you're acting, they're reacting. Know where your wingtips are so they don't plow into the ground. Also, on wide-open areas like the Midway airfield, you can run enemy soldiers over with your plane (the flying equivalent of a knife-kill). (from Markus Mehring)
- Alternately, flying high and coming in steep to attack a flak gun also works well,
since the flak operator often does not look up.
- Another worthwhile tactic is to fly up and down at random while in sight of flak. This way the flak gunner has problems predicting where to lead his target (you). (from CrushedBiPlane)
- The level bomber can drop up to four bombs at a time: hold down the drop button, or, often better, quickly click it four times to spread the fun around a bit more.
- Take bombing runs along the length of the destroyer and battleship, as their flak guns cannot reach these areas. Even the carrier has difficulty with low bombing runs along its length.
- One defense against such bombing runs: jump in the machinegunner's seat of a landing craft still attached to the ship.
- Machineguns in general are great against planes (in the right hands they're more effective than flak), so don't forget about the MGs on APCs, landing craft, tanks, in bunkers, etc.
- If friendly fire and splash damage is off, you can land on the enemy carrier and then drop bombs on it while sitting there, without harming yourself.
- If you fly extremely low, you can jump out and land on the ground (without parachuting) and survive.
- Bombs dropped onto the deck of a carrier do much more damage than those that hit the sides. (from HollowPoint)
- To use plane torpedoes, fly very low and slow directly towards the ship's side and release as early as possible. Torpedoes have unlimited range. (from Pvt. Shifty)
- Plane torpedoes are two to four times as effective when dropped in water at a ship, vs. dropped directly on the ship. 7-8 water hits can sink a carrier or battleship, 4 a destroyer. (from Pvt. Shifty)
- That said, it's often quicker and safer to fly up and down the length of a ship and drop torpedoes directly on it. Destroyers can be especially tough to hit with torpedoes dropped in the water.
- Plane torpedoes do not damage land units unless you get a direct hit. (from Pvt. Shifty)
- Torpedo planes can sink subs, even if the sub is submerged. It takes two torpedoes to destroy a sub. (from Venom400, Pvt. Shifty, and Xenor)
- Torpedoes in water cannot normally hit landing craft (it's possible if you bump them with your sub). (from Pvt. Shifty)
- The wooden decks of the carrier and battleship are more vulnerable than the rest of these ships (except for torpedoes, which are less effective on these decks).
- Shoot the landing craft on ships with your machinegun and they will drop off the ship.
- While a passenger in the C47, hit the "C" key to see what's going on outside. (from Markus Mehring)
- The ME109 can outclimb a Spitfire. This comes in very handy in El
Alamein and Gazala. You can fly higher and they will not be able to see /
reach you on risk of a stall. Use your altitude and navigate using the
mini-map, then come in for a steep bombing run, get out and climb to high
altitude again. (from <TGG> Loki)
- When in an ME109, don't let yourself be challenged to a turn
and twist duel. The Spitfire will win. (from <TGG> Loki)
- In CTF (Capture the flag) it is practical, cool, and impressive to do an airpickup. Take a 2-person plane and fly over the flag. The gunner jumps out and gets the flag while the pilot does a turn and come back and picks up the flag-carrier. The flag-carrier has to press/hold down "E" and the pilot has to fly very low. (from AZO)
Ships
- Engineers can repair everything, including ships. In a ship, take a shot with your gun and repair
a bit while reloading.
- Don't forget that there are two big guns on the battleships and destroyers. Drive and turn so that both guns are useful for hitting the enemy.
- You can jump between guns on the ships by using the number keys. If your ship is empty, you can shoot one gun, jump to the other and shoot, and jump back in time to shoot the now-reloading gun.
- Driving the carrier up to and parallel with the edge of the board is often A Good Thing. It hides it, and some newbie enemy pilots freak out when they attack and get the "Warning! You are leaving the battlefield!" message.
- Friendly ships do not always show up on the large overhead map ("M"), so check your spawn screen ("Enter") to make sure the ship is unfriendly. (from 502 Robinson)
- You can enter the driver's seat of the American (Fletcher) destroyer by standing near the turret and hitting "E" - there's no entryway you can get to. You enter the rear of the Japanese destroyer by standing near its rear turret (or near the entrance of the dark room in the rear).
- Position jumping is also good on the aircraft carrier and battleship for manning the flak guns.
- A tank can sink a battleship or carrier, with enough ammo.
- Better yet, self-propelled artillery deals out about three times as much damage per shot to ships (though reloads slower).
- Flak guns damage destroyers (though it takes a solid 5 minutes of firing to sink one).
- You can climb aboard enemy ships using the nets on their sides.
- If you get close enough to a battleship or destroyer with a sub or landing craft, their guns cannot go low enough to hit you.
- To best conceal yourself as a sub get to the depth just on the green area of your depth meter and press "F10" to see your submarine from an outside view. Try to get so deep that only the tip of the antennae shows. If you go too deep, you won't be able to see your sub in the third person view, so use that as a guide. (from Venom400)
- Alternately, go down until you lose your periscope view, then go up a bit. Or just remember: 1.9 for Allied subs, a little less than 1.5 for Axis subs. You can also look directly behind you with the Axis periscope and watch your water level. (from Strategerm)
- When a round starts, do not submerge your sub immediately. Go on the surface and submerge only when you hear the first enemy plane fly by or when you see an enemy ship. (from Venom400)
- Allied subs have a different kind of periscope and can go a little deeper than Axis. (from Venom400)
- Torpedoes (like most projectiles in this game) are more effective when they strike dead-on against the side of a target vs. at an angle.
- A pair of submarine torpedoes sinks an enemy sub, if the angle is good. (from Xenor)
- If you're too close to an enemy ship (especially a destroyer) with your sub and you're submerged, your torpedoes will go right under the enemy ship. (from Venom400)
- As a sub, you can ram the enemy ship. If surfaced, you'll take at most about 2/3rds damage (depending on speed), but do damage the enemy. (from meanperson)
- As a sub you can ram and sink landing craft and take no damage yourself. (from Xenor)
- Torpedoes do not normally hit landing craft, but can if you're also ramming with the sub.
- As a destroyer hunting a sub, zoom far in when the sub is spotted, go directly over him with the rear of your ship, and drop depth charges. Note that after you use up your 10 depth charges, 10 more are loaded (i.e. you are not limited to only 10).
- There is very little that a soldier can do to damage ships and subs: guns, machineguns, grenades, and explosive packs have no effect. Ramming with landing craft is also ineffectual. (from Xenor)
- You can note where the enemy is landing troops by seeing where empty landing craft appear on the minimap.
- If an enemy is in the water far out at sea and there are no landing craft nearby, let him drown. Shooting him is a mercy killing, as he respawns sooner.
- When you're in a sharp turn, you can release a bomb and it will go sideways into the target. (from <TGG> Loki)
- An oddity: destroyer machineguns run out of ammunition. (from Wayne Miller)
- Useless fact: you can skateboard on the US carrier. Read about it here.
Protocol
- For the clueless, these are stupid/rude things to do: shooting at teammates, driving a tank to get to a plane, and ignoring calls for a ride.
- If you spot for artillery, do it once and then shut up for two minutes. Continually spotting simply throws the artilleryman out of your view of the battlefield.
- If you are firing artillery, ask for spots when you need them by using the radio command "F2 F6". When you get a spot, acknowledge it with "F1 F1" (Roger).
- If you see someone is shooting an artillery piece, it's in bad taste to jump in and drive it off.
- Similarly, if someone jumps out of a gun position in a ship or out of a radar, they may be an engineer doing repairs. It's impolite to immediately jump in and take their position while they're doing so, since they're keeping you afloat/alive.
- In general it's rude to jump into an empty vehicle or stationary weapon that someone else is fixing.
Game Mechanics
- If you are walking or driving straight for awhile, you can hit the team ("L") or general ("K") message key while holding down the move forward key ("W"). You'll continue to move straight without holding "W" now, and can also type a message at the same time. (from CrushedBiPlane)
- While you cannot use the radio buttons while dead, you can type team ("L") and general ("K") messages while you are waiting to spawn. (from 502 Robinson)
- Check out the customization options. Some options worth trying are having all speech be in English, and rotating the minimap to follow the way you are facing.
- Turn off lightmaps and you can see inside buildings more easily.
- Make sure all your important controls (including camera controls and voting) are in easy reach. I have my parachute bound to Z, my camera controls (except for fly by) bound to X, C and V, and my vote keys are about to my forth and fifth mousebutton, so I can vote with my right thumb (I have a Logitech MX700). I encourage you to experiment with the controls and find out what works best for you. (from Private Snafu)
- You can bind the mousewheel to previous and next weapons, but another alternative is to bind the map keys (M, N) to the mousewheel. This makes it easier and safer to use the map to orient yourself. You can move about with your fingers on WASD while enlarging and shrinking the map with the mousewheel. (Strangely, you cannot map the mousewheel movements as alternate bindings for the map keys; you must replace M and N with them.) (from The Mule)
- The three speech hotkeys (commands starting with F5-F7) can be heard by the enemy if they are close enough. This is not true with radio hotkeys. (from Wayne Miller)
- If your spawn point is lost, take a second to look at the map before picking a spawn point far from the front. Your teammates may be just about to capture one, and you can then wait and pick it instead. You can also use the "Free Camera" as long as you want this way.
- To see messages that scrolled off the screen, bring up the control panel (the tilde "~" key, above "Tab") and use the Page-Up and Page-Down keys.
- Pay attention to server settings before connecting, such as whether friendly fire and friendly splash damage is on.
- You can add yourself to your buddy list (type "~ab yournumber") to better see when you kill someone - your kills show up in green. You need to add yourself only once and it then works forever. (from JackTripper)
- If "enemy spotting when you die" is off, then expect more snipers, since you normally won't see where the shot that killed you came from.
- In single-player, don't forget you can pause with "P" if you want to avoid being rushed while you're spawning at the start. (from jalapeno)
- Consider using headphones. You'll notice a lot more subtle sounds, of course, but also you'll be able to pinpoint where fire is coming from more precisely and sooner than with just speakers. (from Markus Mehring) I also recommend getting a switch from Radio Shack that lets you choose between headphones and speakers.
Statistics
Unless otherwise noted, these statistics are all from Wayne Miller. For more statistics, check the weapons effects page.
- Different maps have different scales. The number represents how wide a map is, in meters (or so we're guessing). These values are from using the free makemap perl program.
- 416: Stalingrad.
- 512: Berlin.
- 896: Monte Cassino.
- 1024: Aberdeen, Kharkov, Kursk, Omaha Beach, Salerno.
- 1280: Anzio, Bulge, Husky.
- 1520: Monte Santa Croce.
- 1792: Market Garden.
- 2048: Battleaxe, Baytown, Bocage, Coral Sea, El Alamein, Gazala, Iwo Jima, Tobruk, Wake.
- 4096: Guadalcanal, Midway.
- Despite the different scales, it seems you can see a maximum of about 1.7 squares on any map.
- On Market Garden, a jeep takes 8 seconds to cross one grid square at top speed on flat terrain.
- On Market Garden, a Wespe (Axis artillery) has a maximum range of 3.1 grid squares on level ground to a target of the same elevation. At this distance the total flight time is 10 seconds. At this distance the gun can cover a width about 2 squares wide.
- On Market Garden, bombers fly about 1 map square in 8 seconds, and fighters are about twice as fast.
- On Market Garden, ground vehicles have the following speeds:
- Tiger Tank: 17.5 sec/sq
- PzIV: 15 sec/sq
- Sherman: 15 sec/sq
- Wespe: 18 sec/sq
- APC: 12 sec/sq
- On Market Garden, soldiers move at the following speeds:
- Crawl: 218 sec/sq
- Crouch or Walking: 110 sec/sq
- Running: 36 sec/sq
- On Midway, landing craft and subs move 1 square in about 27.5 seconds. A sub moves 1 square in 46 seconds while submerged.
- On Midway, destroyers, Carriers, and Battleships move 1 square in about 31 seconds.
- On Midway, a torpedo can move a full map square in 20-21 sec. A full square seems to be its maximum range. A full square also seems to be maximum ship-to-ship visibility on navy maps.
- On Midway, sonar is effective to something like 3/4 of a map square.
- On Midway, the battleship and carrier have a turning radius of something like 1/2 a map square at full speed. The destroyer and submarine have a turning radius of about 1/4 a map square.
- On Midway, the battleship fires about 2 squares at maximum elevation. On Iwo Jima, it shoots about 4 squares.
- The Wespe seems to have something like a 45 degree maximum angle; the Battleship has something like a 22.5 degree max elevation. Destroyers elevate beyond 45 degrees. However, shooting above this angle puts the shots in outer space - they never reappear. You should never fire the destroyer gun above about 3.5 out of 7.5 elevation markers on your first shot.
Scenario Strategies and Tactics
Here are some ideas for individual maps. The Annotated Maps page shows control points, vehicles, fixed weapons, and ammo and supply points.
There are two main types of Conquest battles: in one if you have the majority of the control points, the enemy loses tickets as time goes on; in the other, you must control all control points to have this tickdown occur. In the first type of battle, which I'll call "majority tickdown", control points are the key to winning. In the second, which I'll call "monopoly tickdown", paying attention to casualties is also important, as it is difficult to capture all control points at once.
Battle for Anzio
Annotated map and zoomed view. This is a majority tickdown battle, though either side can lose all control points.
- Sneaking behind the hills is a popular hobby.
- It's truly annoying to shoot the flak guns on the island at the central control flag areas. The flak kills people, but also makes everyone see weird flashes of light from the exploding flak. Don't expect to live long, though, once the enemy figures out what's going on.
Battle for Salerno
Annotated map and zoomed view.
- If you grab a jeep at the start, take over the closer control point before going to the center flag. Your teammates can now spawn closer. Obvious, but the majority of people just rush to the top.
- This is an excellent map for picking off a plane with a bazooka/panzerfaust. Planes usually take off and slowly climb the hill, giving you a good shot if you're on the hilltop. For advanced players, position yourself a bit more uphill where you can't see
the airfield (and they can't see you), then fire more or less straight up when they're about to fly overhead. They're still slow enough so that this isn't too hard either. Lots of fun. (from Markus Mehring)
- There is an Easter egg here: stand next to the water tank at the SW (Axis) base and you can hear a man inside the water tank, shouting in Swedish "I can hear you out there, help me..., I'm running out of air..." and banging with a wrench.
Battle of Britain
The bf42.com general forum has a thread on strategy and on how the allies can win this battle.
Annotated map, zoomed view, and full detail. This battle is unique: the Axis tickets tick down, and they must destroy the four radar installations and the factory at E2 before then to win the game.
- A worthwhile Axis strategy is to take out the factory early on; left to the end, there will be four flak guns protecting it.
- Allies: your goal in life is to keep the factory and radars alive, nothing else matters. You will not lose due to excessive casualties.
- Axis: casualties cause your tickdown to go faster, but the main thing is to destroy the targets.
- The radars and factory can be repaired, so being an engineer can seriously help the Allies. Don't wait until one spawn point is left, do it now. Job one when you spawn is to repair; once youre empty then go off and do whatever.
- Radars have 600 hitpoints, factories 1000 hitpoints.
- If an engineer is killed, you can pick up his pack ("G" key) and use his wrench. This can also be handy if you're an engineer and your wrench is "used up".
- While waiting for your wrench to recharge, don't forget to plant some exppacks around your area.
- The radar flak gun has a difficult time shooting to the north; approach from this direction and put the radar tower's antenna between you and this gun.
- Junkers bomber bombs do only 1-1.5 out of 12 "lozenges" of damage to a radar, while the B109 bombs do 4 out of 12. A fully-charged engineer can fix 1.5 lozenges of damage.
- Crashing into a radar or factory does no or very little damage.
- You can repair the factory from the (relative) safety of the garages on its south side.
- Beyond bombs, the radars and factory can be damaged by grenades (at least 24 to kill), exppacks (16 to kill), anti-tank shells (24 to kill), and flak guns. If you run out of explosives, switch packs with dead soldiers to get some more.
- About 6 minutes of shooting a flak gun at the factory will destroy it. (from Stay Dead)
- In addition to hitting the factory, the flak gun south of the factory can hit the radar at F4. You get a hit indicator when you're spot on. Since the radar antenna is hard to hit, the hit indicator comes and goes as the radar rotates. (from Stay Dead)
- Similarly, you can hit the radar between B3 and C3 with the flak gun on the coast at D3. No hit indicator shows; it appears that the explosions damage the radar.
- An annoying tactic is to be a prone Axis sniper on top of the radar tower.
- The bombers in this battle take 300 hitpoints, vs. 100 for the single-seaters.
- The art of plane camping: to usually be first to get a particular plane, stand where the plane spawns and continuously hit the "E" key.
- The Allies can have plenty of fun at the German airbase: mine the end of the runway, steal a bomber, park it, then shoot the guns at everything, etc etc. (from Count Nosferatu)
- It's a bit hard for Axis soldiers to stand on the factory roof and pick off the flak gunners. While on the roof you can walk up the sloped parts in the middle to gain enough height to take the shot.
- Another way for the Axis to be a pest is to hang out in an APC near the airfield and jump in and use the machinegun when an Allied plane takes off. Remember that you don't have to watch the planes themselves; just watch the minimap. When a gray plane disappears, you know an Allied pilot has just jumped in. Also, you can sit in the APC and keep hitting "C" to watch the surrounding area. (from Benaiah)
- Don't forget to honk the jeep's horn by clicking the mouse when driving.
Battle of Midway
Annotated map and zoomed view. This is a majority tickdown battle, so control points are key.
- Planes, flown right, can capture the sea control points by circling them for long enough.
- As a submariner you can spawn camp where the enemy ships spawn, if your morals allow it. (from Venom400)
- When an enemy ship is first spotted, fire your ship's guns aimed at 0 elevation. (from Wayne Miller)
- If you are planning to man a ship, be an engineer who can repair the ship - why be anything else?
- If a number of teammates spawn on the sub and you are driving, it's polite to not immediately dive and instead drive your teammates to where they can jump off and get on another ship. (from Xenor)
- Ram the side of the enemy battleship with your destroyer and it will tilt up and not be able to fire at you. You can also beach enemy ships by pushing them with your ship on to shore. (from Saultydog)
- Pilots: keep your team informed of when you see enemy ships. (from Saultydog)
- Worth repeating: you can note where the enemy is landing troops by seeing where empty landing craft appear on the minimap.
- The tank is important for controlling both island flags. You can keep it happy and healthy while waiting for the enemy to land by parking it in the hangar. (from Saultydog)
- In a clan game, consider keeping the fleet together, capturing one flag at a time. You'll have overwhelming firepower if the enemy splits up. (from Saultydog)
Battle of the Bulge
The bf42.com general forum has an interesting Battle of the Bulge strategy and thread. This is a monopoly tickdown battle, so the Allies should try to hold all five control points as long as possible. After one or two control points fall, this becomes mostly a battle of attrition.
Annotated map and zoomed view.
- Swimming in the river can be refreshing and can help you capture control points.
- Note the lack of medical supply points overall on this map.
- The bridge outpost and St. Vith control points (map E5 and F5) are fairly far from ammunition resupply points. Once you see or hear a soldier's three grenades go off, you'll know he has no more.
- The spawn point at the main Allied base in the south can be controlled by a soldier inside the cemetery.
- If the enemy has the supply base at E7, consider sneaking around south of the base and hiding behind the sandbags just south of the southern tank's spawn point. Pop up and grab it when it eventually reappears.
- Lying in wait amongst the rocks northwest of the bridge control point (map E5) is a lovely spot for an anti-tank soldier. Eventually someone comes down/up the road or over/up the hill and shows their rear to you.
- It can be pleasant for an Allied soldier to lie down among the trees a fair bit south of the northern bridge, east bank, and pick off Axis going to the windmill, across the bridge, etc.
- At the start, it can be profitable for an Allied soldier to take the heavy tank (map G4) and move it to the northern bridge. Instead of crossing, drive forward and backward, perpendicular to the Axis base, only stopping to shoot. Moving makes it hard to hit you, and you can often slow or stop the Axis armor push.
- The ammo dumps at C6 look pretty useless, right? An interesting Axis strategy is to take the artillery and drive from here to the river and shell the Allied base. You then resupply at these ammo dumps. You can also shell the bunker at the bridge, at E5, if need be. (from Legion)
Berlin
Annotated map and zoomed view. This is a monopoly tickdown battle, with the Axis losing if all their control points are taken.
- The south-east control point (map E5) can be converted by standing inside the building west of it, underneath the stairs on the first floor (behind the ammo box there), or from the room just north of here, standing in the south-east corner. (from Markus Mehring)
- As the Axis, run fast at the start, especially if the game just loaded, and you might be able to steal an Allied tank. If you drive it off and protect it (call for repairs with "F6 F5"), you deny its use to the Allies, since it won't respawn.
- Don't forget about the machinegun at the end of the street at E1.
- Consider being an engineer at the beginning. As Allies, it almost assures victory if you can keep the tanks alive for any period of time. As Axis, you can run into the T junction where the Allied tanks come out and lay mines, to try to give your team time to set up a defense. The expacks also help as the Axis, because many Allies go the main road when they spawn at the start, so you can take out fistfuls at a time. (from Pat McGregor)
Bocage
Annotated map and zoomed view. This is a majority tickdown battle.
- The windmill has windows along the stairs, and the higher one is useful for sniping, especially for the Allies to snipe the Axis spawn point across the bridge. You can snipe just fine with the assault gun, plus there's plenty of ammo, medical supplies, and beer available in the windmill itself. (from LOVETHATJAPJEEP)
- Don't forget the machinegun on the top floor of the barn, between C5 and D5. Snipers love to shoot this gunner, though. Being a medic might be a good idea.
- Instead of manning this machinegun, another option for the Axis is to snipe from the shadows through this window. You can shoot at the areas around the windmill and lumbermill. If you zoom in to the left of the windmill you can just make out the flak gun and spawn point between D5 and E5. (from Bartholomew Roberts)
- Since the only medical supply point between the bases is at the windmill, being a medic could be wise for you and your team.
- Swimming across the river is sometimes safer than walking across the bridge.
- Parking an Allied tank at the east end of the bridge nearest the Axis base can make life unpleasant. (from Jim Egan)
- An Axis player can grab the Wespe at D6 and drive into the small village to the south. Park behind the barn by the ammo crate at D7. From here, you have a resupply of ammo and are nearly invisible to planes and enemy armor heading for the nearby bridge. Parked in the ideal spot you can shell the Allied base and plane campers for game after game before they figure out what is going on. (from Bartholomew Roberts)
- You can use a jeep and sneak around through the northern (usually empty) part of the map to the enemy base. This is especially useful in CTF games. An Allied player can infiltrate the town by the Axis base and cause all sorts of havoc. The Axis has less fun sneaking around, but can still pick a nice sniping spot behind a tree at the end of the runway, or rush in with a jeep (you can jump it over the sandbags at the small hill immediately to the right of the bridge where the Allied planes respawn) and steal a plane. It's also a long drive with a Tiger, but fun when you get there. (from Bartholomew Roberts)
Coral Sea
Annotated map and zoomed view. Sinking the enemy carrier is the normal way to win this battle, otherwise it's won by fewer casualties.
- There are many forms of mayhem in this battle: land on the enemy carrier, land on the nearby island and man the flak or defgun, land on your own nearby isle or the middle isle and use the flak gun. Dropping mines on the deck is ever-popular, and using bazookas on planes taking off is also popular.
- Remember that you can quickly jump from flak gun to flak gun by pushing its position number. This can help you both attack and escape.
- If you see someone trying to man your flak gun on the carrier and you're already in the seat, you should try to shift to an unmanned flak gun. In this way, both of you quickly get a flak gun, instead of your teammate having to walk a long way or giving up.
- My favorite defense: drop a exppack next to your flak gun. When you see an enemy, immediately escape to position 1, exit, and blow up the exppack.
- You can snipe from the carrier to the nearby isle, or snipe from isle to isle. The Japanese can also set up a sniper on the metal framework "wings" at the back of their carrier, to pick off boarders.
- The common way to avoid flak is to do bombing runs along the length of the carrier. Some people even do a half-loop at the end of a run to avoid coming within sight of the flak (this works particularly well against the Japanese carrier).
- Another method is to approach from high up and do a steep dive, as flak guns do not tend to look in this direction.
- It's good practice to bomb the island flak and defense guns pointing at your carrier as you fly off towards the enemy.
- As a carrier flak gunner you can also shoot and destroy this island defense gun.
- You can swim from most island clusters to their neighbors, including the central isle. You cannot swim between the two southern island clusters; swimming between the central island and the southern islands is possible, but just barely (and you will take drowning damage).
- You can swim from either carrier to the nearby island by walking off the corner of the carrier closest to the island, parachuting forward, and swimming.
- In large games, it's common to jump out of a flak gun to repair the carrier and then find someone's taken your seat. To avoid taking a long walk, consider first hopping to position 1 (which is almost always empty), getting out and repairing, going back into position 1, and then moving to a free flak gun.
- Position 1 is also handy for getting a sense of which flak gun to man. You can see what's coming from the front by default, and hitting "C" lets you look to the rear, too.
- You do not have to drive the length of the carrier to take off. You can drive off either side.
- If you see an enemy swimming in to board your carrier, set up some expacks to welcome him. Remember that expacks do not hurt ships.
- When friendly fire is off, it's entertaining to land on the enemy carrier and steal a plane. Your own teammates can't shoot you down (though they'll try), and enemy flak guns tend to leave you alone, since they often look at the plane markings and not the player name.
- Another "friendly fire off" tactic is to land on the enemy carrier, or steal a plane, and sit and drop bombs - hurts them, not you. This is normally extremely difficult, as you'll usually get shot up in no time. This tactic is pretty cheap, though, and is usually called "deckbombing".
- The coastal defense gun between F3 and F4 (east side of the NE island) cannot see the Axis carrier, but can hit it just fine. You just need to aim a bit above the hill, as shown here. A scout, though shown, is not needed to help you aim. Watch your targetting cursor for the flash when you hit. This is a cheap and boring tactic - do it once if you must, then move on.
- The NW coastal gun at C6 (SW island) cannot hit either carrier at all.
The Eagle's Nest
Annotated map and zoomed view.
This is a majority tickdown battle in Conquest Mode, with the possibility that either side can lose all flags. In Objective Mode the Allies must destroy the large double door and safe inside at B4.
- The door and safe each need 7 exppacks to open them. Note the two handy ammo boxes near the entrance.
- It's possible to climb to the top of the hill from the southwest control point by going almost directly north. You'll pass below the highest hill to the northwest and come out between the two northern control points.
El Alamein
The bf42.com general forum has an interesting El Alamein strategy and thread. This is a majority tickdown battle.
Annotated map and zoomed view.
- A quick flight and bailout to the northern or southern control point at the start is worthwhile, and a tank will spawn when you capture the control point. If you're a good pilot, you can even land at the southern outpost and take off again.
- Once your team has two control points, consider defending. The enemy is now losing tickets. Trying to take the third control point is psychologically gratifying, but can lose you the other two control points. (from JohnnyKnoxville)
- Consider the engineer. You can mine and seed ex packs around your control point, and you can repair tanks and flak guns.
- The sandbags at the eastern control point can help defenders from either side be protected. Put your tank on the sides away from the enemy.
- One way for the Allies (in particular) to take the southern control point is to not come from the east, but drive past the outpost and come from the west. The jeep can make it up the hill from the east, as can a tank if you find a good path (I haven't).
- Similarly, the Axis often takes the northern control point by going over the mountain gap southwest of it, and Allied tanks often use this route to attack the main Axis base. This gap is a good place for either side to mine the far (unseen) side, so killing a tank as it comes over the hill and cannot see.
- An interesting clan tactic is stealing all enemy vehicles and planes, hiding them someplace like your hangar, and having someone who jumps in and out of each vehicle in turn to keep it from self-destructing. In this way the enemy never gets new vehicles back.
- Some of the best sniping spots are right out in the open. On El Alamein, an Allied sniper can wreak havoc from on top of the Axis factory. You can easily pick of the hordes of players running for planes, and if enemy spotting when you die is off, it takes them forever to finally figure out where the shots are coming from. (from Cpl. Bingham)
Essen
Annotated map and zoomed view.
This is a majority tickdown battle (though the majority loss affects only the Axis, i.e. when they're down to their last base, or worse) in Conquest Mode, with the possibility that the Axis can lose all flags. In Objective Mode the Allied goal is to destroy the three giant fuel silos at the weapons factory at B4-B5.
- If the Allies take the easternmost flag, they also get a second spawn point, a parachute spawn over the center of the city.
- At the factory complex in the west, there is a gap you can walk through between the concrete bunker north of the bridge and the fence north of it. (from Freakhead_5)
- Instead of coming from the north side to get into this gap, you can walk straight up the riverbank just north of the bunker, facing towards the fence. See the screenshot. (from Freakhead_5)
- In Objective mode, it takes 15 exppacks to destroy a fuel silo.
- If you pick the C-47 transport plane as a spawn point and find that it says you've lost your spawn point, this sometimes means that everyone else picked this as a spawn point and it filled up. Check that the plane is still flying and wait for people to jump out, then pick it again.
- A nice use for the sturmtiger at the weapons factory is to drive it to a location just north of the wasserfall. You can shoot through the chain link fence down the street. If enemies try to cross the bridge, aim at the concrete bunker on your side for some serious splash damage. You can get more ammo at the "tollbooth" by the bridge.
- If you're on the city side of the bridge with a tank, don't forget that you can fire at and destroy the wasserfall. It takes a solid minute for the wasserfall installation to respawn. The bad news is that you have to actually destroy the rocket when it's on the launch pad to destroy the installation.
- If you parachute in to the weapons factory, the flakpanzer there can also be used against the wasserfall, as can the flak gun south of town, southeast of the factory. Three good hits with the flakpanzer kills the wasserfall. While shooting at the concrete bunker is ineffective, shooting at the door (if possible) works great.
- At the southernmost spawn point in town (at C5), there are stairs to the second floor of the building south of this flag. Strangely enough, you can walk right through the handrails on the second floor.
Gazala
Annotated map and zoomed view. This is a majority tickdown battle.
- The neutral control point in the south-southeast (map G7) can be controlled by standing behind the southern building, and also by people on the cliffs above to the south.
- If you have to walk by foot from the starting bases at E7/8 and G6 towards G7, consider walking along the ridge to the south. It's often safer, and you have more ability to surprise and ambush the enemy.
- To help take the isolated base at F5, drive a tank from your home base up the mountain to the west of this base. There are a few spots where you can rain down shells on the base but the flak guns can't hit you. There are also locations to slide the tank down the mountainside safely to take the control point. (from Dave K.)
- Driving up from the south to base F5, there are places just outside the fence that are just inside the control radius.
- When you own the control point at G6 and the enemy has F5, consider using artillery or even a tank to bomb F5 from the north part of G6, near the bridge, or from the ridge next to the village.
- You can parachute onto the roof of the NE building at the southernmost outpost (E7) and be in the flag control radius. This will drive the other team crazy if you stay up there. This tip also probably works with the other outposts, too. The hard part: getting down without dying.
- At the start it's entirely possible to land a plane on the road by the isolated north outpost (in the center of the map), capture it, then take off. (from KalfirethO2)
- There's an odd pit on this map, a natural wonder, near the southwest corner of G1: you walk into it and you magically reappear outside of it; you drive a jeep into it and the jeep gets tossed into the air. Here are screenshots 1,
2,
3,
4, and
5. (from angry, screenies from Vincent)
- There is another "natural wonder" in the southeast corner of A1 near the abandoned Allied airfield. (from Marcus Andersson)
The Gothic Line
Annotated map and zoomed view.
This is a majority tickdown battle.
- Yes indeed, the Axis tanks can drive down the very steep hill at various places and take the eastern flag early on.
- A good Allied infiltration tactic is to work your way along the west side of the hill west of town. You can turn the flag at C5 from the nearby bunker, while also tossing grenades from the ammo box there. (from trenspb)
- It's also popular to turn this flag from the barracks northeast of it, in the corner.
- Turning the flag at D4 can be done from the relative safety of standing just north of the building west of this flag.
- The Allies normally should not waste much time on the defgun at F4 if they're attacking the eastern control point. It cannot hit anything from E5 northeast, inclusive.
- It is possible to walk up the steep hill just east of the eastern flag at F5. Allies thus can sneak into the (unconvertable) Axis base, steal vehicles, attack the enemy's back while coming down the hill, and do lots of other fun things. (from Markus Mehring)
- Just like on Iwo Jima, the defensive guns can (and do) shoot each other. You can memorize the exact place to aim each gun to kill the other one.
Guadalcanal
Annotated map and zoomed view. This is a majority tickdown battle.
- A fun way to start the game is to drive a destroyer down, do what damage you can to the other fleet (you're an engineer, of course), then eventually driving a landing craft to the enemy base and stealing a tank.
- As the Axis, if the Allies control the southern outpost, moving an artillery to the northwest corner of E6 can be effective. Allies that spawn get nuked, plus you also have a nice view of the surrounding terrain.
- The self-propelled artillery are good for taking on enemy destroyers. 20 hits or less can sink one, and the destroyer can have a tough time firing back.
Hellendoorn
Annotated map and zoomed view. This is a majority tickdown battle in Conquest Mode, though either side can lose all control points. In Objective Mode the Allies must destroy the four rockets near the control point at C7.
- The two jetpacks are on the top floor of the building near the center flag, which appear when the central flag comes under control by either side. Grab one of them ("G") and you are now a machine-pistol wielding flying guy. Hit the space bar continuously to take off and gain altitude.
- The planes are very handy for getting to unmanned enemy flags, particularly the central flag at the start. If you also have a jetpack on, you don't even have to open your parachute, so keeping your arrival more secret.
- You can drive the amphibious vehicles off cliffs and drop into the water and take no damage. (from Grimdeath)
- The Allied amphibious vehicle cannot be damaged by gunfire (including machineguns), but three grenades takes it out.
- Consider jumping between the two MGs on the Allied amphibious vehicle (positions 2 and 3) - useful if one MG overheats, and more importantly it makes it difficult for the enemy to get a bead on you.
- Shoot the rocket planes! The Natter goes down with two machinegun bullets, the Goblin with five.
- You can sneak behind the circular concrete building by the central west flag. You'll be out of bounds for almost 9 seconds, but can make it if you hug the wall.
- People enjoy grenade spamming from the entryway of the building by the central flag. The simplest countertactic is to throw a grenade at them from the alleyway east of the church. Another is to shoot a bazooka shell or tank round so that it hits the stone entryway (not the interior) at a glancing angle - this creates rock fragments that then bounce into the hallway and kills the spammer. Finally, if you have a jetpack, go in an upper window.
- Setting up a tank at the south end of the central hill, north of the ruined bridge, in the bunker next to the ammo box, is a pleasant way to fire upon the southwest part of the map.
- This bunker is also a nice place to snipe the town, even with an assault rifle.
- The flak tank does have a machine gun for the driver, but you have to aim it by driving the tank. Goofy.
- You can climb the hill to the north of the Southeast control flag.
- The hills to the west and east are common ways to infiltrate the enemy position; even tanks and jeeps can be driven up there. In particular, at the Northwest town you can drive up the hill at the north end of the town from the road. A jeep can get all the way to the southwest corner by driving behind the round building up the hill.
- In Objective Mode Allied tanks can shoot at the missiles from some distance. You can tell if you're hitting by watching if the Axis percentage count goes down.
- The central flag can be converted from the doorway of the first floor and from the south wall of the second floor of the building north of it.
- The Southeast flag can be converted from the north and west sides of the building next to it, as well as from on top of that building by a jetpack guy or paratrooper.
- You can convert the Southwest flag from the riverbank south of it.
- The West-central control point can be controlled from underneath it, and above it from the roof of the large round building. (from Grimdeath)
- The Northwest flag can be converted from both rooms of the building next to it, the roofs of the buildings to its west, and from the end of the alleyway going west from it.
- You can control the North-Northeast flag from the roof, the closer room, and the riverbank.
- The East-Northeast flag can be converted from the rooftop.
- A popular hobby is to stay behind the hill by the East-Northeast flag and grab the tank when it spawns to the north of there.
Invasion of the Philippines
This is a monopoly tickdown battle, with the additional possibility that the Allies can lose all spawn points.
Annotated map and zoomed view.
- The flak gun at C6 is handy for fending off invaders coming from the north.
- Vehicles can be driven down the bank east of the southern end of the bridge at B5 and so be able to attack the flag at D5 or sneak up on the flag at C4.
- You can drive the destroyer captain and crew nuts by driving PT boats up next to them, underneath the destroyer's guns. Don't forget to drop some mines if you're approaching from the front.
Iwo Jima
The bf42.com general forum has an interesting Iwo Jima strategy and tactics thread. This is a monopoly tickdown battle, not including the beach control point (which the Axis cannot capture). The Axis lose if all control points are taken and not recaptured.
Annotated map and zoomed view.
- The Axis can never convert the control point on the beach, at D4.
- Common landing areas are C3 and E6. At C3, just south of Mt. Suribachi, you can run up the hill. At E6 there is a flat, protected road right to the airfield's control flag.
- Worth repeating: as the Axis, you can note where the Allies are landing troops by seeing where empty landing craft appear on the minimap.
- At the start as Axis, move the tank on Mt. Suribachi to the bottom of the hill. Allies will often try to infiltrate at C3, and often the battleship or carrier will come into view - shoot, and watch the crosshairs to see if you hit.
- At the start as Allies, you usually get to your planes before the Axis do, so go strafe their airfield immediately.
- Allied scouts: it takes about two seconds to spot something with your binoculars for the battleship to shoot at. Do it. The battleship is actually more effective the farther out it is, as the shells can arc over hills and so hit more targets.
- If someone has brought in the battleship or carrier and a defgun is whacking it, man the flak guns to shoot defgun.
- Consider being a sniper if you do spawn at the Allied flag at D4. Hide by the shore. There are three machine gun nests to shoot at, and a whole silhouetted ridge of possible targets. Don't forget to call in artillery.
- Think before you decide to drive: if the battleship is moving, any artillery spots called in by scouts are just about useless.
- Opinions differ about the battleship. Driving it to the far side of the island gives more chance to blow up tanks, as well as bomb the airfield if positioned properly. Do not position it too close to Mt. Suribachi or you will not be able to hit it.
- The defensive guns on Mt. Suribachi and below on the plain can (and do) shoot each other. You can memorize the exact place to aim each gun to kill the other one.
- With a good scout spotting for it and a good defense, the Mt. Suribachi gun can rule the battlefield, as it can hit almost everywhere on the island below.
- The two bunkers near each other at D4 and D5 and the defgun entrance are pleasant places to set up shop. Rush up to one side, lie down, and wait for enemies to run by and expose their backs to you.
- A cute Allied sniper trick, when enemy spotting when you die is off (so they won't know where it's coming from): take a landing craft out towards Mt. Suribachi, exit it, and snipe the mountain, etc. Reenter now and then so the landing craft does not self-destruct.
- If someone is sitting on the repair pad with a tank, use the flak gun across the field at the right edge of D5 to take him out. (from Uberllama)
Kbely Airfield
Annotated map and zoomed view.
This is a majority tickdown battle in Conquest Mode. In Objective Mode the Allied goal is to destroy the two UFO aircraft in the hangars in the center and northeast of E4.
- For a cool Evil Knievel stunt, it is possible to jump over
the western base fence with a motorcycle. Go high speed on the road/pathway
in D4 leading east, make sure you're going nicely up the shallow hill, and
you'll land in E4 inside the base. The bike itself might not survive this
stunt depending on how you land (it is possible to do this without taking
any damage at all), but exiting it just before it crash-lands, the driver
and gunner will definitely survive. Just make sure you have enough speed,
otherwise you'll land short and die. (from Markus Mehring)
- In the initial rush, use the motorcycles to get to the flags as quickly as possible. An obvious tip, but often not done.
- There is a rocketpack in the attic of the building at the center of E5.
- The flak gun between E5 and F5 is your friend if you're Allied. Great for planes, tanks, and defenders just inside the fence and elsewhere.
- You can shoot tank shells through the chain link fencing.
Kharkov
Annotated map and zoomed view. This is a majority tickdown battle.
- The control points at the bridges can be controlled by people down by the riverside.
- Swimming in the river is a pleasant thing to do if you want to capture the hill. For the Allies, the riverbank pokes out into the river at C7, making for a shorter swim.
- There's a crossing spot at E5 where it is so shallow you never even have to swim.
- Mines put on the grass at the ends of the two bridges are quite difficult to see. At the very beginning of a game it's worthwhile to rush over in a jeep to the end of the enemy bridge and mine it, as their armored column will rush over it.
- There is a nice sniping spot on the hill at D6, overlooking the flak batteries. There is a gully running down the center of the hill that you can lie in, so avoiding making a silhouette against the skyline.
- When the enemy is nuking your home base with artillery on the hill, get out of the area and destroy it with a few magazines of single shots from your assault rifle. Artillery is vulnerable everywhere except the bottom half of the front and sides of the vehicle. You should see hits scored if you are aiming properly.
Kursk
Annotated map and zoomed view. Control of both control points makes the other side lose tickets.
- Don't forget about the flak gun at F4.
- The green ground camouflages mines exceedingly well. Toss a few in front of the oncoming enemy.
- You don't have to drive the artillery units towards the enemy; ask for a spot, and a sniper might actually use his binoculars and you can shoot from afar.
- If the Axis can capture the two middle points, they can sit at the lumbermill and shell the Allied base with artillery without ever leaving the ammo box.
- The Allies can do the same thing with katyushas (Russian artillery trucks) but these don't have enough visual range from the lumbermill to hit anything but the very front edge of the Axis base. A scout can help, of course.
- In a clan game, move both katyushas and an APC (for ammo resupply) out on the ledge above the main battlefield. Get the range and then fire all rockets as fast as you can (recoil will give you just enough scatter to get maximum effect). When that Katyusha is empty, start firing the other while the empty Katyusha resupplies by moving a little bit while next to the APC. (from Bartholomew Roberts)
- If you park with your rear end up against the lumbermill at Kursk, you are harder to spot and more difficult to bomb, but more vulnerable to infantry attacks from inside. (from Bartholomew Roberts)
Liberation of Caen
Annotated map and zoomed view. This is a majority tickdown battle, with the possibility that the Axis can lose all their control points.
- The Allied paratroop spawn point at F3 becomes active whenever the Allies control at least one control point (other than their starting flag, of course).
- Whenever this spawn is active, it's endless fun to park a tank next to the ruined building near the bridge and shoot the paratroops as they come down. You can drive up the little hill by the ruin to angle your MG towards the sky and so stay safe in your tank.
- There is a handy machinegun on the roof of the central building that points south, everyone knows about that one. From this rooftop jump over to the building north of it, then walk the plank to the next rooftop. The machinegun here sweeps the northernmost spawn point, plus you can lie down and shoot at the western spawn. Being a medic is a good choice here: if people shoot you, drop prone and heal.
- If you run into someone squirrelled away on the top of a building, you have a few choices: shoot him, of course, toss a grenade from underneath nearly straight up, or go up there yourself and take him out.
- A pleasant little defensive tactic for an engineer holding the spawn point at the bridge is to drop an expack outside and in the entryway, then go inside the building's first floor and lie down behind the table. When an enemy enters, boom.
- Everyone likes to turn the westernmost graveyard flag by lying down inside the sandbag semicircle. Instead, lie down next to the south wall of the church - at least your back is covered, and it's unexpected.
- Moving the Wespe east of the Allied home base, across the river, is a happy spawn-camping spot.
Mimoyecques
Annotated map and zoomed view.
This is a monopoly tickdown battle in Conquest Mode, with the possibility that the Axis can lose all flags. In Objective Mode the Allied goal is to destroy the 3 V3 vents around D7.
- A key element to victory is, of course, the C-47 transport plane. The Allies should fly it high and circle out of flak range. The Axis should use the Wasserfall to keep it from taking off, and use planes to shoot it down.
- Another interesting strategy is to land the C-47 on the mainland. It still acts as a spawn point, and if the Axis don't notice...
- Also, fly the C-47 very low can also work: people jumping out can land without even pulling their parachute. Sometimes.
- The flag in the bunkers at the top of hill reminds me of Omaha somehow... The difference is that you can convert this flag from outside of the bunker system, standing on the hillside north of the flag.
- It's boring and useless to get stuck on the starting island as the Allies with no good way off. One idea: instead of respawning on the island, wait while you're dead. As soon as someone eventually takes a flag, choose to spawn there.
- Also, if you pick the C-47 transport plane as a spawn point and find that it says you've lost your spawn point, this sometimes means that everyone else picked this as a spawn point and it filled up. Check that the plane is still flying and wait for people to jump out, then pick it again.
- At the control point near the water at D5, you can lie down and hide on the second floor of the burnt out building south of the flag and be inside the flag's radius. You can also be in the radius on the south-west corner of the second floor of the building to the north-east.
- You can turn the flag in the center of town at D5 by standing outside the fence to the east of it.
- In Objective Mode, a fairly safe place to repair the westernmost vent is on the hillside southwest of it. You can lie down here and be in range to fix it.
Monte Cassino
Annotated map and zoomed view. This is a monopoly tickdown battle.
- Destroy the anti-tank guns as they do not respawn; repair them, as they do not respawn.
- The anti-tank guns do relatively little damage to the front of the M10 (10 hits to kill, vs 2 to the sides). So always drive the M10 forward and swivel the turret.
- As the Allies, drive your tank over the eastern bridge and come up on the side of the lowest anti-tank gun, going to the left of the trees at the bottom of the hill. This anti-tank gun can't hit you in this location, though the ones further up can. One shot to the side of an anti-tank gun wheel will destroy it.
- Don't forget you can also drive the M10 across the eastern bridge, too, especially if the western bridge is mined.
- Bazookas are also effective against an anti-tank gun. One shot to the side wheel can destroy it.
- If you drive a Priest across the river and you have captured no control points yet, you are confusing it with an armored vehicle. Stay back and learn to use artillery.
- As Allies you can sneak along the western edge of the battlefield, jumping in and out of "You are leaving the area...". You can scale the western side of the mount and get in through the convenient hole in the wall.
Monte Santa Croce
Annotated map and zoomed view.
- One of the best uses of any plane at the very start is to get to the topmost control point rapidly. Others can respawn up top then and so win the game. If you do this, try to crash the plane as you jump so it will respawn quicker.
- You can drive tanks from the main base directly towards the hill through the barbed wire. You may take damage, but it's faster and usually safer than the long way around. If you do take damage, just rush to the closest repair grid beneath the hill.
Omaha Beach
Annotated map and zoomed view. Control of both control points (not including the beach control point, which the Axis cannot capture) makes the other side lose tickets. The Allies typically lose this scenario; they must rush to get the central control point as quickly as possible.
Allied Strategy: The favorite way for the Allies to lose on this map is to have more than two snipers and never get off the beach. You really do not need more than two snipers, mostly to keep the Axis machineguns unoccupied and to call in the artillery.
- Scouts: it takes about two seconds to spot something with your binoculars for the destroyer/def guns to shoot at. Do it. Artillery is a key resource in this battle.
- The Axis can never convert the control point on the beach, at D5.
- However, the Axis can stop the Allies from converting it by having someone hide in the beached landing craft in its radius. It can take the Allies a long time to figure out why they cannot convert it. (from Morat)
- The destroyer just needs a little turn to the right and a small move forward to allow the back gun, which is callable as artillery, to reach anywhere on the map. Otherwise, unless you are getting shelled, don't move it.
- You can get down the cliffs between the two lower bunkers and between the two def guns undamaged, by walking into the cliff all the way down or by going prone and sliding. (from [H]Arrow)
- To the west of the defense gun at D3 it is also possible to slide and scamper down the hill in order to attack the trenches. You take a little damage from the barbed wire but otherwise are fine.
- You can go to the east of the wooden fence along the eastern edge of the battlefield, in the town area. You'll go out of bounds for a few seconds, but can easily make it back in and outflank the enemy. (from Iain)
- If you can't turn the flag at the central control point (at D3/D4), look for enemies in the "room" just north of the flagpole or lying on top of the nearby walls.
- The bottom of the hillside to the north of the crest of the hill is a pretty good location for an Allied sniper. You show no silhouette, and people do not tend to look there. Better than being a silhouette.
- For the Axis, lying snug against the hillsides at the tops of the two ramps up from the beach are pretty good ambush and sniper spots. People tend to turn and look towards the middle of the map when they reach the top, so you can shoot them in the back.
- From the top of the hill, sniping from in front of the right defense gun can be good for a bit, as you show no silhouette.
- There are a number of good spots for firing on the enemy on the top hill when you have the middle flag: inside the bunkers (though most snipers on the hill know this and aim at your player name), prone at the east end of the wooden fence east of the hill, and (surprisingly) prone from the field west-northwest of the central bunker complex. People tend to not look at this last spot, figuring no one's stupid enough to lie in the open there.
- The machinegun at the north end of the street in E2 is worth remembering.
- The destroyer on Omaha Beach is invisible to the Axis defguns via binocular sitings. Even though scouts see it just fine, it only shows water through the binocular view. However, if people are on the deck of the ship, artillery can see them and target the ship accordingly. (from Bartholomew Roberts)
- In a clan game, you can talk the artillery onto the ship. Have the artillery fire and type "h" for high or "l" for low to tell him to raise or lower his elevation until he is on the ship. When he hits the ship type "FFE" (Fire for Effect). Anybody can do this, and sinking the destroyer really slows down the Allied effort. (from Bartholomew Roberts)
- You can "scout your feet" with the binoculars so that you get the azimuth & altitude view of a scout. +0.8x, +0.9y from the left (east, E3) Omaha defgun hits the destroyer in the rear at the landing craft. It's +0.4x, +0.75y for the right gun (at D3). Yes, this is sleazy - do it once and get it out of your system. (from PvtGuthrie)
- As Axis or Allies, you can also just find a place to aim the artillery pieces to hit things, and memorize the exact aim points. One thing that helps is the "you have a hit" indicator after you shoot. Obviously, if the destroyer moves, all bets are off either way. Yes, this is also sleazy. (from Bartholomew Roberts)
- If your destroyer is indeed getting shelled, move it to the east or west edge of the map, with the rear gun facing the coast. The artillery function of the ship's rear guns can then be used safely. (from Martin(SWE))
- The APC and Tiger can both be driven directly down this same hillside and take no damage. (from Bartholomew Roberts)
- If driven well, the APC and tanks can reach the center flag. You can drive over the trench gaps.
- Appearing at a bunker slit is an invitation for a sniper to shoot you. Toss grenades out from a distance.
- A fairly annoying way to defend the central flag from the Allies is to sit in the bunker next to the ammo box and continuously lob grenades out the back entrance.
- By now, the way this game often goes is: an Axis soldier or two hide out inside the beached landing craft within the flag's radius. An axis sniper spots the destroyer. Defgun sinks the destroyer. Game (mostly) over. (from LSSAH-LAVINA)
Operation Aberdeen
Annotated map and zoomed view. This is a majority tickdown battle, though either side can lose all control points.
- If you take a little collision damage while initially rushing out of the main base, don't stop and repair. Do this repair using the repair grid when you capture the first base.
- If you can't grab a tank in the initial rush, take the machinegunner position. At the first base captured there will be two vehicles that appear.
- Since tank shells do no splash damage, artillery is quite powerful in this battle if used correctly.
- If your side is stuck in its base, consider rushing along the right edge of the battlefield. It is difficult to hit a moving tank, and you might be able to slip into the rear and take a flag. If nothing else, a number of enemy tanks will rush after you, so easing the pressure on your base.
- The defguns can hit most bases (including each other) on the map.
- An almost perfect spot for bazookas: Take the ladder at the back of the building with the red circle. Lie down and crawl forward. And you get X-ray eyes. Shoot those rockets in the available tanks. Other people can climb up as well, and people can spawn there, making this place almost, but not completely perfect. (from <TGG> Odin)
Operation Battleaxe
Annotated map and zoomed view. This is a majority tickdown battle.
- This battle often devolves into a round-and-round-they-go game of control point swapping. You can sometimes help your team best by backing your tank against a hill and picking off the enemy infantry as they come up. (from thinman)
- This can be a good map for snuggling up in a rock outcropping or behind other cover and picking people off as they run by.
- Driving the Axis artillery to the far right of the home base, between the building and the flak, gives you the ability to hit any flag.
Operation Baytown
Annotated map and zoomed view. This is a majority tickdown battle, though either side can lose all control points.
- Expect heavy grenade spamming from any of the ammunition boxes on the hills.
- The British home base can be converted by someone on the middle level of the tower, it is inside the flag's radius. This is not true of the Italian home base.
- Sniping (especially with the BAR or Breda) from the center island, by the rocks, is lots of fun. Up until you get a bullet in the head, of course.
- For more fun, swim to one of the tiny islands north and south of the main island and snipe from there.
- Planes can dominate on this map, so don't forget that machineguns (esp. in APCs) are highly effective against them.
- If you're on the beach at D3, expect a sniper to be lurking in the upper window of the building by the E2 spawn point.
- There is a minor easter egg of sorts: the map
has been signed. In the south-eastern corner of A8, at the very edge of the
map, there are two small islands in the shape of someone's initials (NS, probably for Niclas Svensson). This doesn't appear on the mini-map
or anywhere else, you can only see it when flying there or when looking
down at it from the top of the cliffs (i.e. from B8 looking west). (from Markus Mehring)
Operation Husky
Annotated map and zoomed view.
- If you are stuck on the beach as Allies, you can get up the hill along the east coast at a certain point. Sorry, you'll have to figure it out yourself - experiment with a self-hosted map with no one on it. You have to get a running start.
- The central flak gun is also good for stopping armor, and even infantry. Until a sniper kills you.
- Jeeps can be driven into the back-country east of the battlefield. Enter the hills by driving past the rocks south of the ruined house above the control flag east of the river.
- Infiltrating behind the hills to the east and west of the battlefield is a popular way to gain control points in the rear.
- If you are Axis and your last control point is the village across the river, infiltrate by going east of the hill to the north, over and down to the river there, then working your way west behind the hills to the westmost control point at C5 - it will normally be unoccupied.
- To silence the defgun from the beach, drive a tank below it up fairly close and fire away. The gun cannot lower itself enough to hit you.
- You're at the west of the bridge and want to take the eastern town's control point. Cross the bridge walking on top of the wall. If you run into resistance, jump off and parachute. Climb the bank north of the bridge and sneak along north of the town.
- One easy way to convert the east town's flag is to stand directly east of this flag on the eastern side of the north-south wall east of the flag. (from Triforcer)
- Another more dangerous, but still hidden, method is to stand inside the building in the corner nearest to the flag.
- The M10 is the best tank in this battle. A fun pasttime for an Italian soldier is to get ready to slide down the hill next to the British beach flag and grab it.
Operation Market Garden
The bf42.com general forum has an interesting Operation Market Garden strategy and tactics thread. This is a majority tickdown battle.
Annotated map and zoomed view.
- At the start, the Axis need to rush jeeps ahead and grab some control points ASAP.
- The control points at the bridges can be controlled by people underneath the bridges, and from the other side of the roads.
- The capture-zone for the central flag is very large, even extending outside the ring of buildings, so you don't need to crouch next to the flag, out in the open. You can capture this flag by entering the rubbled building to the north-east from the east. (from Peel)
- You can capture the central flag from the rooftop of any of the (intact) buildings. The easiest way to get up there is to parachute from a plane. (from Peel)
- As the Allies, when you first spawn via parachute and run through the town toward the long bridge you will capture that flag while just running through. No stopping necessary. (from hothead2)
- Snipers can take out enemies on the roof from the church tower (gives a clear line of sight to nearly the entire rooftop area, best overall location), on top of the long bridge, the hills to the east and west, and possibly from the windmill and other locations on the Axis side. (from Peel)
- The walkways on each side are just wide enough for a jeep, and usually aren't mined. (from Peel)
- Allied pilots should consider focussing on protecting the church, where two tanks spawn, rather than getting ripped up by flak at the Axis base. (from Cold One)
- The building just to the west of the long bridge is good place for anti-tanks to hole up. The tanks often don't look up there while they're blasting away at the bunker. (from Peel)
- Use the MG42 machinegun in the bunker to the right of the long bridge on the Axis side to fire at the Allied side of the stone bridge. (from Major Fumble)
- A good place to put the Wespe artillery is to the left of the middle bunker on the Axis side. There the Allied planes will often fail to find it. You can then shell the Allied control point at the stone bridge. (from Major Fumble)
- You can also help by shooting at Allies near the stone bridge from the south bank east of this bridge; safest from inside the house. The flak gun just east of here, at D5, can also hit soldiers and tanks on the north-south ridge to the northeast of the stone bridge.
- As Axis, grab the Wespe artillery and place it near one of the AA guns. You can fire at the two flags at the two bridges as well as the church and the parachute spawn point from this side of the river. Switch from artillery to AA on the fly as soon as a plane approaches. (from Tetris L)
- As the Axis you can swim into town under the long bridge. Bring a medic, as you'll start to take drowning damage at the end. (from Armstrong)
- Alternately, go partway across a bridge, jump off, parachute, and swim the rest of the way.
- As the Axis, take an APC to the church, park it on the west side right up against the church wall and man the machinegun. Allied paratroopers will hate you forever. (from Killet)
- The ammo supply point at the exact center of D4 (next to the building wall, not the shed) is a fine place to park your carcass, especially if you are Axis. It is inside the control flag radius for the central control point, it has a good view of
paratroopers coming in, and you are well camouflaged.
- You can set up a pleasant ambush by standing in the church on the second floor with a view of the first floor's stairway (i.e., not the top of the stairway but the bottom, by looking down on the first floor). You can keep the church neutral and take out a few enemies before someone figures out they can toss a grenade up to you (or rush you with a few soldiers).
Peenemünde
Annotated map and zoomed view.
This is a majority tickdown battle.
- The back road at B6 through B4 is a good way for either side to use a motorcycle to infiltrate the other side.
- If the Axis have the wasserfall under their control, the Allies can shoot tanks at it from across the water at their home base. The bad news: the only way to destroy the wasserfall installation with a tank from this distance is to shoot the actual rocket before it is launched; hitting the concrete installation does no damage.
- Yes, the Goblin jets are mostly useless for actually killing anything (except as kamikaze bombers). One nice use is to fly by the Axis tank showroom floor at D5 and see if you can take any of the models out for a test drive.
Raid on Agheila
Annotated map and zoomed view. This is a majority tickdown battle.
- There is an Axis sniper rifle on the floor of the raised crane by the central control point, at E4. You get to it using a jetpack (or jumping from a plane); there is also a jetpack up there to use once you're out of ammo.
- It's wise to toss a grenade or two through the second story windows before attacking the northeast or northwest buildings to capture their flags. (from Littlebits)
- If your side owns the northwest control point and the other side has the northeast, note that there is a fine ambush point in E3 among the crates. You can hide here and shoot people in the back as they attack your flag.
Stalingrad
Annotated map and zoomed view. This is a majority tickdown battle.
- You can stand underneath various ammo supply boxes (otherwise unreachable and almost invisible) and resupply. Learn the map!
- Defense here is vital: defend two control points and you have won the game, no matter what casualties you take.
- If someone is grenade spamming or otherwise nuking the entrance of your control point building, consider taking the ladder out the back. You might drop a grenade (using right mouse click) out this window first.
- If your flag goes neutral in one of the buildings, lob a tank shot into the third story window to kill the intruder.
- Obscure fact: you can throw grenades underneath the southern control point building (map D4). To the right of the ladder in the back there is a thin gap at the bottom of the wall. Get close and throw down and they go inside, hurting people within.
Telemark
Annotated map and zoomed view.
This is a majority tickdown battle in Conquest Mode, with the possibility that either side can lose all flags. In Objective Mode the Allies must enter the heavy water facility at F6 and destroy the two generators inside the building.
- In Objective Mode, it's wise for the Allies to take the transport plane up very high, out of site, above the objective and circle there. Troops can then spawn and drop onto the objective.
- In Objective Mode, it takes about 11 exppacks to destroy a generator. Put the exppacks under the spindle, between the two generators, for greatest effect.
- The generator building has two very small windows in the roof, at
its front center area near the entrance and flagpole. It is possible to
parachute onto the roof and try to take out some defense that's inside.
Also, the flag can be converted from up there. (from Markus Mehring)
- The tank at F4 is often forgotten and also a bit time-consuming for the Axis to reach at the start. An Allied pilot can often get to it faster.
- Study the map. The southern bridge at D7 is usually mine-free, has supplies and emplacements, and is a pleasant way to infiltrate in either direction.
- The flakpanzer is very effective on this map. Place it on the hilltop at
the bridge, at the bridgehead closer to the research base. From here
you can shoot almost all positions on the map, planes, boats, tanks and
infantry. They simply can't get close enough to kill you. (from LSSAH-LAVINA)
Tobruk
Annotated map and zoomed view. This is a monopoly tickdown battle, so the Allies want to hold onto all control points as long as feasible. After one or two are lost, it becomes a battle of attrition, with the Axis having a chance of taking all Allied control points and winning.
- As the Axis, it's often possible to capture the Allied base by taking a jeep or tank along row 7 of the map, following north of the water, and coming up behind the base. There is sometimes a nice shiny tank destroyer or Sherman waiting there for your use.
- At the start, as the Allies, parking a tank by the right side of the leftmost frontline bunker (at E6) gives a nice view of the oncoming Axis vehicle parade. It's also next to an ammo box, so fire at will.
- If you are the Allies and down to one or two spawn points, try to figure out how to sneak to the control point farthest away from you. All the Axis are normally converging on your one spawn point, leaving the rest of the battlefield empty.
Wake Island
Annotated map and zoomed view. This is a monopoly tickdown battle, so the Allies want to hold onto all control points as long as feasible. After one or two are lost, it becomes a battle of attrition, with the Axis having a chance of taking all Allied control points and winning.
- When the game switches and this map is first loaded, an Axis player who spawns early can jump in a plane, parachute into the NW village, and steal the tank. This can result in the rapid capture of the two northern villages.
- When most Allies are fighting at the two ends of the island, drive a landing craft up the bay to the main village (with the airfield). Land and jump in the defgun. You are now converting their flag, and can shoot people coming up the southern road.
- Around the point where F4 and F5 meet is a high point in the road. Putting mines on the side farther from the enemy is effective, as they won't see the mines until they go over the rise.
- It is pleasant to drive the destroyer to F3 and bomb the NE village until the Axis captures it. Then go off the coast at E6 and fire at will.
- Driving the destroyer down further to south of the airfield is even more demoralizing. If you keep the Allied aircraft from ever making it off the ground, the destroyer is very hard to take out.
- The defgun inside the village at the airfield can be pointed inland towards the west, and scouts can spot for it.
- If this defgun is shooting at your side, you can fire the flak gun SW of it at it.
- It's rewarding to snipe from the NW end of the island across the bay to the SW end, or vice versa.
- You can also swim from the NW village to the SW one, or vice versa, and not drown. You'll almost drown, though, so make sure you take the shortest route possible.
- A popular way to infiltrate is to go along the east coast from the NE village and then go up the hill at the NE corner of F6, arriving behind a building with an ammo box. Opportunities abound to shoot planes, snipe the enemy, or rush for the control point.
- This building is also a good place to go inside and set up shop as a sniper. (from Adalius)
- Many of the village control points can be converted from outside the village, e.g., from the beach.
- Worth repeating: as the Allies, you can note where the Axis are landing troops by seeing where empty landing craft appear on the minimap.
- If someone decides to drive the carrier along the coastlines, use the carrier's flak guns to also pick off tanks and APCs.
Contributors
Thanks to [H]Arrow, 502 Robinson, PvtGuthrie, Hollow Point, CrushedBiPlane, John Lewis, hothead2, Armstrong, Major Fumble, Peel, Tetris L, Venom400, Pvt. Shifty, Jeff Spindler, Killet, Spacelord, Wayne Miller, meanperson, Bartholomew Roberts, Xenor, Saultydog, Legion, thinman, eggman|exp, Zorkk, LOVETHATJAPJEEP, Dave K., Von Schnopp, Adalius, Ralph Wiggum, Cpl. Bingham, AZO, Pat McGregor, Grendel, Dracle, [-|-]Mr. Flibble, {BHRD}RCT.-hb, Morat, OddBall, Twinkletoes, Strategerm, Uberllama, angry, Vincent, jalapeno, Count Nosferatu, Stay Dead, Grimdeath, JackTripper, Triforcer, DrewatOrigin, trenspb, Markus Mehring, CrazyBri, Martin, Jim Egan, Freakhead_5, Littlebits, Benaiah, LSSAH-LAVINA, Richard Brogdon, <TGG> Loki, <TGG> Odin, The Mule, Flyer Guy, KalfirethO2, Iain, Martin(SWE), Marcus Andersson, and many other players for posting and emailing their ideas.
Related Links
I also have a Frequently Asked Questions page, an Annotated Maps page, and a Weapons Effects page.
Back to main page.
Eric Haines, a.k.a. [Fredhead] / erich@acm.org
Last change: October 29, 2020
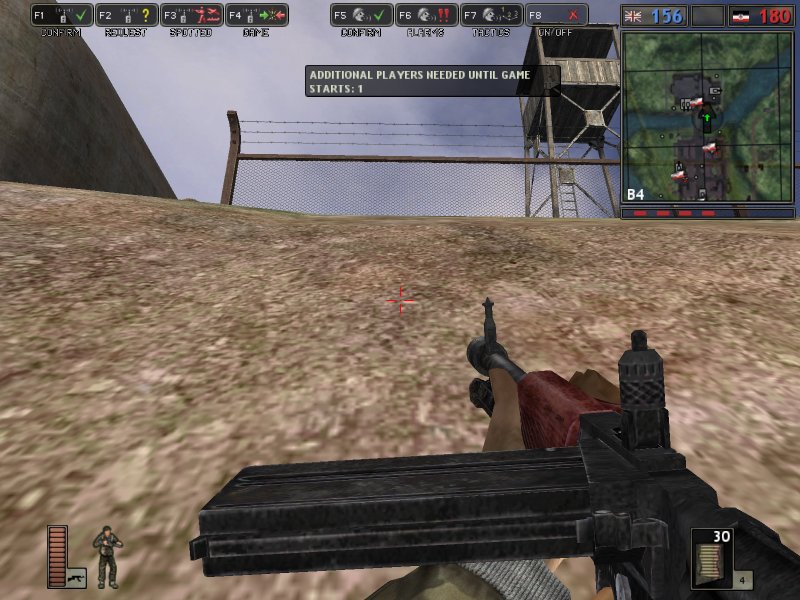